To turn on the Jetson hoverboard, locate the power button and press it.
Contents
Getting Started With Your Jetson Hoverboard
Congratulations on your new Jetson Hoverboard! This cutting-edge mode of transportation is not only innovative but also packed with amazing features. In this guide, we will walk you through the process of turning on your hoverboard for the first time. Let’s dive in!
Unboxing And Inspecting The Hoverboard
Before you start using your Jetson Hoverboard, it’s important to inspect it carefully to ensure everything is in perfect condition. Follow these steps to unbox and inspect your hoverboard:
- Remove the packaging material and gently take the hoverboard out of the box.
- Check the surface of the hoverboard for any scratches or dents.
- Inspect the wheels, ensuring they are properly aligned and free from any damage.
- Look for any loose cables or connectors.
- Verify that all buttons and LED indicators are in place and intact.
By thoroughly inspecting your hoverboard, you can identify any issues before using it and take appropriate action if needed.
Understanding The Different Components And Features
Now that you have inspected your Jetson Hoverboard, it’s time to familiarize yourself with its different components and features. This will help you operate the hoverboard smoothly. Here are the key components and features to be aware of:
| Component | Description |
|---|---|
| Battery indicator lights | LED lights that indicate the battery level of your hoverboard. |
| Power button | A button used to turn the hoverboard on and off. |
| Foot pads | Large pads where you place your feet to control the hoverboard. |
| Charging port | A port where you connect the charger to charge the battery. |
Understanding these components will help you navigate and troubleshoot any issues that may arise during your hoverboard experience.
Charging The Hoverboard For The First Time
Next, it’s time to charge your Jetson Hoverboard for the first time. Follow these steps to ensure your hoverboard is ready to go:
- Locate the charging port on your hoverboard.
- Connect the charger to the charging port. Make sure it is securely plugged in.
- Plug the charger into a power outlet.
- Wait for the battery indicator lights to turn on. This indicates that the charging process has started.
- Allow your hoverboard to charge fully. This typically takes around 2 to 3 hours, depending on the initial battery level.
- Once fully charged, disconnect the charger from the hoverboard.
Remember, it’s important to charge your hoverboard fully before your first ride to ensure optimal performance.
Now that you have unboxed, inspected, and charged your Jetson Hoverboard, you are ready to embark on an exciting hoverboarding adventure. Follow these steps, and you’ll be gliding smoothly in no time. Enjoy the ride!
Safety Precautions And Equipment
When it comes to riding a Jetson Hoverboard, safety should always be your top priority. By following a few simple precautions and ensuring you have the right equipment, you can enjoy a fun and safe ride every time. In this section, we will discuss the essential safety measures to take before hopping on your hoverboard.
Wearing Appropriate Safety Gear
Before venturing out on your hoverboard, it’s crucial to wear the appropriate safety gear. This includes:
- Helmet: Protect your head from potential injuries by wearing a well-fitting helmet. Look for helmets specifically designed for hoverboard riders, as they provide enhanced protection for your entire skull.
- Knee and Elbow Pads: Protect your joints by wearing knee and elbow pads. These pads minimize the risk of injuries during falls and collisions, ensuring your safety while riding.
- Wrist Guards: Wrist guards provide additional protection for your wrists in case of a fall. They can prevent fractures and sprains, keeping your hands safe while on a hoverboard.
- Appropriate Shoes: Choose close-toed shoes with good traction for riding a hoverboard. Avoid wearing loose-fitting or open-toed footwear that may cause accidents.
Choosing A Suitable Riding Location
When it comes to selecting a riding location for your hoverboard, there are a few key factors to consider:
- Flat and Smooth Surface: Opt for a riding area that is flat, smooth, and free from obstacles. This will ensure a stable and secure ride without any sudden bumps or jolts.
- Avoid Traffic: Stay away from busy roads, intersections, and crowded areas. Ride your hoverboard in a safe environment to minimize the risk of collisions and accidents.
- Well-Lit Areas: If you plan to ride your hoverboard during low-light situations, make sure to choose well-lit areas to enhance visibility and reduce the chances of accidents.
Inspecting The Hoverboard Before Riding
Prior to each ride, take a moment to inspect your hoverboard to ensure it’s in proper working condition. Here’s a quick checklist:
- Battery: Check if the battery is fully charged. Inspect the battery pack, cable, and connectors for any signs of damage or wear.
- Tire Condition: Inspect the tires for any punctures, worn treads, or uneven wear. Make sure they are properly inflated to ensure a smooth and stable ride.
- Hoverboard Body: Check the hoverboard’s frame, body, and components for any cracks or damage. Ensure that all parts are securely attached and in good working order.
- Lights and Indicators: Ensure that the hoverboard’s lights and indicators are functioning correctly, especially if you plan to ride during low-light conditions.
Understanding Weight Limits And Restrictions
Each hoverboard model has specific weight limits and restrictions that you must adhere to for your safety. Exceeding the weight limit can affect the performance, stability, and control of your hoverboard. Before mounting your hoverboard, check the manufacturer’s guidelines to ensure you are within the recommended weight range.
By following these safety precautions and equipment guidelines, you can confidently turn on your Jetson Hoverboard and embark on a thrilling and safe riding experience. Remember, safety should always be the first step before enjoying any outdoor activity.
Turning On Your Jetson Hoverboard
Welcome to the exciting world of hoverboarding! If you’ve just purchased a Jetson Hoverboard and are ready to embark on thrilling rides, the first step is to turn it on. In this guide, we will walk you through the process of turning on your Jetson Hoverboard, locating the power button and indicators, and understanding the different light indicators and their meanings. Let’s get started!
Locating The Power Button And Indicators
The power button is an essential component of your Jetson Hoverboard. To locate it, you need to find the lower part of the board, where the battery is housed. In most Jetson models, the power button is conveniently placed near the rear wheel, at the back of the hoverboard.
Once you have located the power button, you’ll also notice a set of light indicators positioned nearby. These lights serve as valuable cues, providing important information about your hoverboard’s power status and other key features.
Step-by-step Instructions For Turning On The Hoverboard
Now that you know where to find the power button, let’s go over the step-by-step instructions to turn on your Jetson Hoverboard:
- Position your Jetson Hoverboard on a flat, stable surface. It’s crucial to ensure that the board is balanced and secure before turning it on.
- Once you have confirmed that the hoverboard is stable, locate the power button at the back of the hoverboard near the rear wheel.
- Press and hold the power button for a few seconds until you see the indicator lights illuminate. This signifies that the hoverboard has powered on.
- Release the power button and wait for a brief moment as your Jetson Hoverboard completes the startup process.
- Voila! Your Jetson Hoverboard is now ready to provide you with an exhilarating ride.
Understanding The Different Light Indicators And Their Meanings
The light indicators on your Jetson Hoverboard play a crucial role in providing valuable information about various aspects of the board. Understanding these indicators is essential for smoothly operating your hoverboard. Here’s a breakdown of the different light indicators and their meanings:
| Light Indicator | Meaning |
|---|---|
| Solid Green | Hoverboard is powered on and ready for use. |
| Blinking Green | Battery level is between 0% and 20%, indicating it needs to be charged. |
| Solid Red | Battery level is below 10%, in need of immediate charging. |
| Blinking Red | Hoverboard is experiencing an error, and it needs to be addressed. Refer to the user manual for troubleshooting. |
These are the primary light indicators you may encounter while using your Jetson Hoverboard. Make sure to pay attention to these lights to ensure a safe and enjoyable ride every time.
Now that you know how to turn on your Jetson Hoverboard and understand the light indicators, you’re all set to embark on exciting adventures. Happy riding!
Troubleshooting Common Issues
Turning on a Jetson Hoverboard is usually a simple process. However, sometimes you may encounter a few common issues that prevent your hoverboard from powering on. In this section, we will explore some of these issues and provide you with practical solutions to get your hoverboard up and running again.
Hoverboard Not Turning On: Possible Causes And Solutions
If your hoverboard is not turning on, there are a few potential culprits behind this issue. Let’s take a look at some of the possible causes and their corresponding solutions:
- Battery depletion: The most common reason for a hoverboard not turning on is a completely drained battery. In such cases, plug your hoverboard into a power source using the included charger cable. Allow it to charge for at least two to three hours before attempting to turn it on again.
- Faulty power button: Sometimes, the power button itself might be malfunctioning. Check for any visible damage or debris around the power button area. If you notice any issues, consider replacing the power button. Contact the manufacturer or a professional technician if needed.
- Loose connections: Loose connections between the battery and other components can also prevent your hoverboard from turning on. Carefully inspect the connection points and make sure they are securely attached. If you find any loose connections, gently reconnect them.
- Software glitches: Occasionally, your hoverboard’s software may encounter glitches that prevent it from turning on. In such cases, try performing a soft reset. Locate the reset button, usually located near the charging port, and press it for a few seconds. This should reset the system and resolve any software-related issues.
Hoverboards rely on batteries to power their motors, and battery-related issues can arise from time to time. Here are a few common battery problems and their solutions:
- Inadequate charging: If your hoverboard’s battery does not hold a charge for very long, or seems to drain quickly, it may be due to inadequate charging. Make sure to fully charge your hoverboard before each use, as this helps optimize battery performance.
- Battery swelling: A swollen battery is a serious issue that should not be ignored. It can lead to potential safety hazards and should be addressed immediately. If you notice any signs of battery swelling, such as bulging in the hoverboard’s casing, do not attempt to use it. Contact the manufacturer or seek professional assistance as soon as possible.
- Battery replacement: Over time, all batteries will degrade and lose their capacity to hold a charge. If you find your hoverboard’s battery no longer provides sufficient power, you may need to consider replacing it. Consult the manufacturer’s guidelines or seek professional help for battery replacement.
Calibrating The Hoverboard For Better Performance
Proper calibration is crucial for optimal hoverboard performance. If you notice any stability or control issues, calibrating your hoverboard can help resolve these problems. Here’s how you can calibrate your Jetson Hoverboard:
- Find a level surface: Place your hoverboard on a flat and even surface, ensuring it is stable before proceeding.
- Turn on the hoverboard: Press the power button to turn on your hoverboard. It should be fully charged before calibration.
- Engage calibration mode: Look for the calibration mode option in your hoverboard’s user manual. Different models may require different processes to activate calibration mode.
- Follow the calibration process: Once calibration mode is activated, follow the instructions provided by the manufacturer to calibrate your hoverboard. This usually involves leaning forward and backward, as well as making slight adjustments to the footpad angle.
- Complete the calibration: Once the calibration process is finished, turn off your hoverboard and then turn it back on again. This will ensure that the new settings take effect.
By following these troubleshooting tips and properly calibrating your Jetson Hoverboard, you can overcome common issues and enjoy a smooth and exhilarating ride every time.
Practicing And Improving Your Riding Skills
Once you’ve successfully turned on your Jetson Hoverboard, it’s time to enhance your riding skills and become a confident rider. Practicing regularly and focusing on improving your technique will help you enjoy a smoother and safer hoverboard experience. In this section, we will provide a step-by-step guide to mounting and getting off the hoverboard, teach you the basics of balancing and steering, help you master turns and maneuvers, and finally, guide you on increasing speed and navigating different terrains.
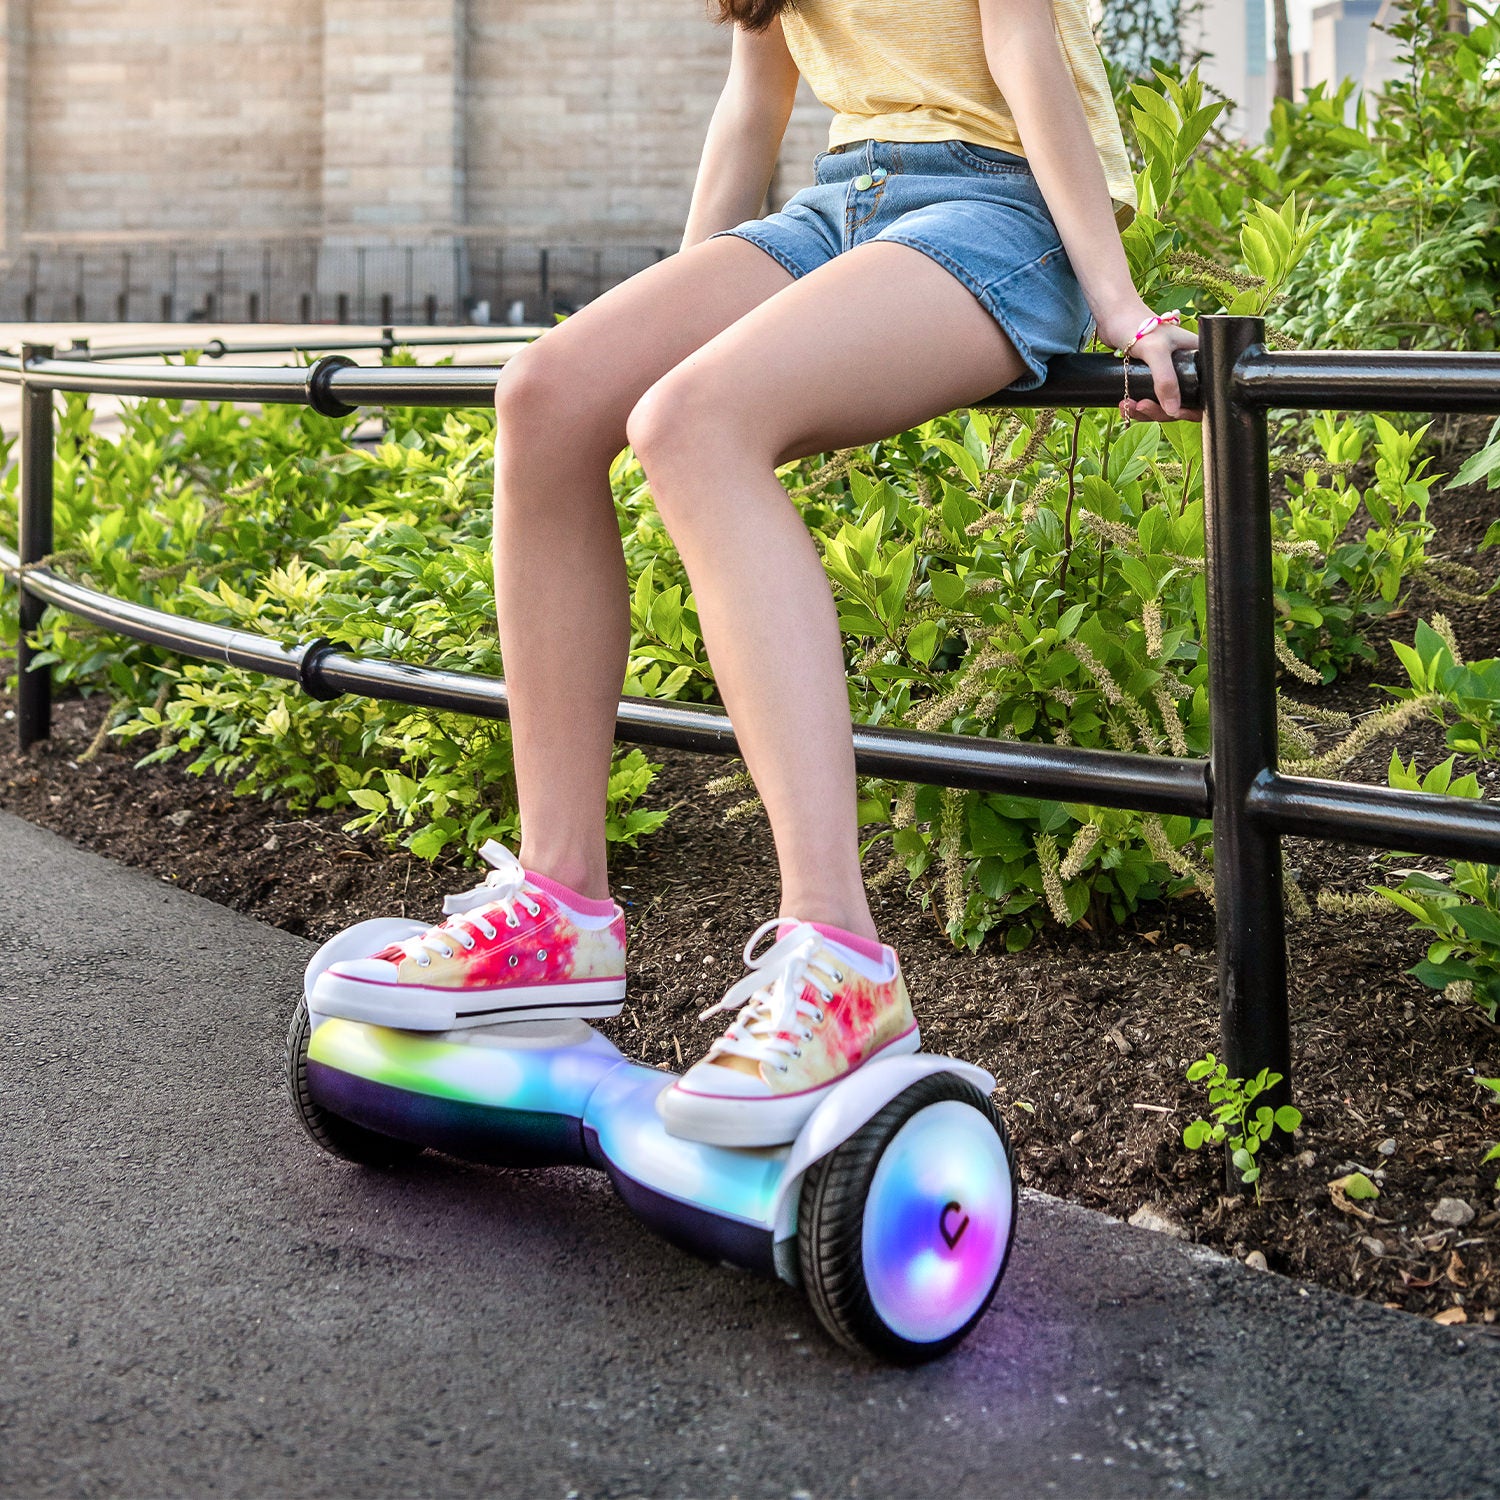
Step-by-step Guide To Mounting And Getting Off The Hoverboard
Mounting and getting off your Jetson Hoverboard should be done with caution to prevent any accidents or injuries. Follow these steps to ensure a smooth transition:
- Find a flat and even surface to practice on.
- Stand with one foot on the ground and the other near the Hoverboard’s center.
- Using your foot, push the Jetson Hoverboard slightly forward to activate the self-balancing feature.
- As the board balances itself, quickly lift your other foot and place it firmly on the opposite sensor pad.
- Practice this mounting process until you feel comfortable and stable.
Learning The Basics Of Balancing And Steering
Mastering the basics of balancing and steering is crucial for a smooth and safe ride on your Jetson Hoverboard. Follow these tips to become a pro at these fundamental skills:
- Maintain an upright posture while riding, distributing your weight evenly on both feet.
- Keep your head up and look forward to help maintain balance and a straight path.
- To steer, shift your weight slightly to the left or right, leaning your body in the desired direction.
- Start practicing in an open area with minimal obstacles, gradually increasing the difficulty as you gain confidence.
- Continued practice will help you develop muscle memory and make balancing and steering feel natural.
Mastering Turns And Maneuvers
Now that you’ve mastered the basics, it’s time to take your riding skills to the next level by learning turns and maneuvers on your Jetson Hoverboard:
- Shift your weight and lean in the direction you want to turn.
- Keep your eyes focused on the direction you want to go.
- Practice making gradual turns at first and then progress to sharper turns as you become more comfortable.
- Start with small jumps or a quick hop, maintaining balance throughout.
- Once you feel confident, try more advanced tricks such as 180-degree spins or riding in a circular motion.
- Remember to always prioritize safety and wear protective gear when attempting new maneuvers.
As you become more comfortable and confident on your Jetson Hoverboard, you can gradually increase your speed and conquer different terrains:
- Start slowly and gradually increase your speed as you gain control and confidence.
- Keep practicing your balancing and steering techniques to ensure stability at higher speeds.
- Start with flat, smooth surfaces before attempting more challenging terrains like grass or gravel.
- Be aware of any obstacles or uneven surfaces that may affect your balance.
- Make sure your hoverboard is suitable for the terrain you plan to ride on.
- Consider investing in hoverboard accessories such as off-road tires for better traction on rough surfaces.
Frequently Asked Questions
How Do You Use A Jetson Hoverboard?
To use a Jetson hoverboard, simply step onto it and balance yourself. Use your body movements to control the direction and speed. You can accelerate by leaning forward and slow down by leaning backward. To turn, shift your weight towards the desired direction.
Why Wont My Jetson Hoverboard Work?
There could be various reasons why your Jetson hoverboard is not working. Check if it is properly charged or there is any damage to the battery. Inspect the connections and ensure they are secure. If the problem persists, contact the manufacturer for further assistance.
How Do You Turn On The Lights On A Jetson Hoverboard?
To turn on the lights on a Jetson hoverboard, locate the power button and press it. The lights will illuminate, allowing you to ride in style and enhance visibility in low light conditions. Enjoy a safe and illuminated hoverboard experience!
How Do I Turn On The Jetson Hoverboard?
To turn on the Jetson Hoverboard, locate the power button usually located on the bottom of the board. Press and hold the power button for a few seconds until the LED lights come on and the hoverboard powers up. It is important to read the user manual for specific instructions on your model.
Final Thoughts
Turning on your Jetson Hoverboard is a breeze when you follow these simple steps. By ensuring both the board and the remote control are fully charged, you’ll be ready to embark on an exhilarating ride in no time. Remember to carefully read and understand the user manual, as it provides crucial information on essential functions and safety precautions.
Embrace the excitement and pleasure of riding your Jetson Hoverboard while staying safe and in control. Let the adventure begin!