To calibrate a hoverboard, first make sure that it is turned off and in a level position. Then, use a Phillips head screwdriver to tighten or loosen the screws on the bottom of the unit until the red light on the hoverboard’s power button turns on. Once the power light is lit, press and hold the “forward” button for three seconds.
The hoverboard will beep twice and the lights will flash to indicate that it is successfully calibrated.
- To calibrate a hoverboard, you will need to connect it to a power source and turn it on
- Once the hoverboard is turned on, you will need to hold down the power button for 3 seconds
- After 3 seconds, the LED lights on the hoverboard will begin to flash and this indicates that the board is in calibration mode
- To complete the calibration process, simply drive the hoverboard in a figure 8 pattern for 10 seconds
Contents
- 1 How to Calibrate a Hoverboard Hover-1
- 2 How to Reset a Hoverboard?
- 3 How Long Does It Take to Calibrate a Hoverboard?
- 4 Hoverboard Calibration Not Working
- 5 Hoverboard Won’t Reset
- 6 Do Hoverboards Need to Be Calibrated?
- 7 How Do You Fix an Unbalanced Hoverboard?
- 8 How Do You Realign a Hoverboard?
- 9 How Do You Calibrate a Hover One Hoverboard?
- 10 FAQs
- 11 Hoverboard Red Light-How To Calibrate your Hoverboard
- 12 Conclusion
How to Calibrate a Hoverboard Hover-1

If you’re the proud owner of a Hover-1 hoverboard, you might be wondering how to calibrate it. Calibrating your hoverboard is important in order to ensure that it functions properly and safely. Here’s a step-by-step guide on how to calibrate your Hover-1 hoverboard:
1. First, make sure that your hoverboard is turned off and unplugged.
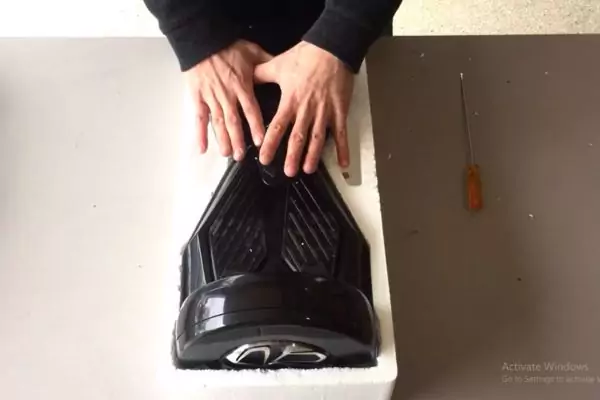
2. Next, locate the two black calibration screws on the underside of the board.
3. Using a Phillips head screwdriver, loosen both screws until they are no longer tight. Do not remove the screws completely – just loosen them so that they can be turned easily.
4. Now, plug in your hoverboard and turn it on.
5. Slowly turn each screw clockwise or counterclockwise until the red LED light on the board turns green.
Once both lights are green, your hoverboard is calibrated and ready to use!
How to Reset a Hoverboard?
If you’re like most people, you probably bought a hoverboard with the intention of having lots of fun. But after a few days or weeks of riding, you may have noticed that your hoverboard doesn’t seem to be working as well as it did when you first got it. If this is the case, don’t worry – there’s an easy fix.
All you need to do is reset your hoverboard. Here’s how to reset a hoverboard:
1. Start by unplugging the battery from the hoverboard. You’ll usually find the battery under a panel on the bottom of the board.
2. Once the battery is disconnected, press and hold the power button for 30 seconds. This will clear any residual power from the board and help reset it.
3. Reconnect the battery and turn on the hoverboard. It should now be working properly again!
How Long Does It Take to Calibrate a Hoverboard?
If you’re thinking about buying a hoverboard, you might be wondering how long it takes to calibrate one. The answer is that it depends on the model of the hoverboard and the brand. Some brands have easier-to-use calibration tools than others.
Generally speaking, it shouldn’t take more than a few minutes to calibrate your hoverboard. The first step in calibrating your hoverboard is to make sure that it’s turned off and in a level position. Once it’s turned off, you’ll need to find the calibration tool that came with your hoverboard.
If you can’t find it, most brands have an online tutorial that will show you how to use their specific calibration tool. Once you have the calibration tool, follow the instructions for your particular model of the hoverboard. In general, you’ll need to put the calibration tool against the sensors on the bottom of the board and then hold down a button until the light on the tool turns green.
Hoverboard Calibration Not Working
If you’ve been having trouble with your hoverboard not working properly, it might be time to try calibrating it. Calibrating your hoverboard can help fix many common issues, such as the board not responding to controls, veering off to one side, or even shutting off completely. The process of calibrating a hoverboard is actually pretty simple and only takes a few minutes. All you need is a flat, level surface to work on and something to prop up the front of the board (we used a chair).
Once you have those things ready, just follow these steps:
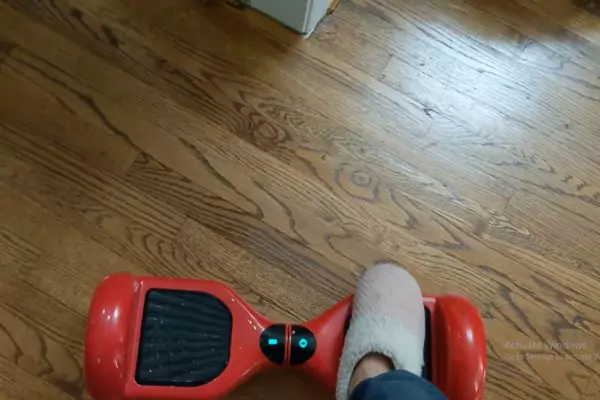
1. Turn on your hoverboard and place it in calibration mode. This is usually done by holding down the power button for 3-5 seconds until the lights start flashing.
2. Place the front of the board on your chair or another object so that it’s elevated about an inch or two off the ground. The back wheels should still be touching the ground.
3. Use your remote control to slowly move the board forward until both sets of wheels are spinning at the same speed. If one wheel starts going faster than the other, simply stop and wait for it to catch up before continuing.
4. Once both wheels are moving at an equal speed, hold down the “forward” button on your remote for 5 seconds to complete the calibration process. Your hoverboard is now calibrated and should work properly!
Hoverboard Won’t Reset
If your hoverboard won’t reset, there are a few things you can try. First, check the batteries. If they are low, they may need to be replaced. Next, check the connections between the board and the batteries. Make sure they are tight and secure. Finally, check the fuse on the board. If it is blown, you will need to replace it.
Do Hoverboards Need to Be Calibrated?
Hoverboards, also known as self-balancing scooters, have been gaining in popularity in recent years. But like any new technology, there are a few things you should know about before you buy one. One of the most important things to know is that hoverboards need to be calibrated regularly.
Most hoverboards come with a calibration tool and instructions on how to calibrate your board. If yours didn’t come with a calibration tool, you can usually buy one online or at a hoverboard retailer. The process is relatively simple: you just need to place the calibration tool on the ground and then stand on the board.
Once the board is balanced, the lights on the calibration tool will turn green, indicating that it’s properly calibrated. It’s important to calibrate your hoverboard regularly because if it’s not properly calibrated, it could malfunction and cause you to fall off. In worst-case scenarios, people have even been injured after falling off their hoverboards because they weren’t properly calibrated.
How Do You Fix an Unbalanced Hoverboard?
If your hoverboard is unbalanced, it’s likely because the self-balancing sensors inside the board have become dislodged. To fix this, you’ll need to open up the hoverboard and realign the sensors.
1. Begin by unscrewing the screws on the bottom of the hoverboard. You may need a Phillips head screwdriver for this. Be careful not to lose any of the screws!
2. Once the bottom plate is removed, you should see the two self-balancing sensors mounted on either side of the board. These are usually silver in color and have a small circuit board attached to them.
3. Carefully remove both sensors from their mounts and realign them so that they’re level with each other. Once they’re aligned, screw them back into place and replace the bottom plate of the hoverboard.
4. Screw all of the screws back into place and power on your hoverboard to test if it’s now balanced correctly. If it still seems off, repeat steps 2-4 until it’s working properly again!
How Do You Realign a Hoverboard?
If your hoverboard is veering to one side or feels out of balance, it may be time to give it a tune-up. Hoverboards are self-balancing, two-wheeled scooters that use sensors and gyroscopes to stay upright. But like any machine with moving parts, they can sometimes get thrown off course.
First, check the tires to make sure they’re inflated evenly. Uneven tire pressure can cause a hoverboard to lean to one side. If the tires look good, then it’s time to check the sensors. The sensors are what tell the hoverboard which way is up and keep it balanced. They’re located under the foot pads on either side of the board. To access them, you’ll need to remove the pads (they should just pop off).
Once you have access to the sensors, gently clean them with a soft cloth or cotton swab dipped in rubbing alcohol. This will remove any dirt or debris that might be interfering with their signal.
Once the sensors are clean, put everything back together and try riding again. If your hoverboard still isn’t balanced correctly, there may be an issue with the gyroscopes inside the wheels. These can sometimes become dislodged or damaged during rough rides. If this is the case, you’ll need to take your hoverboard to a certified repair shop for service.
How Do You Calibrate a Hover One Hoverboard?
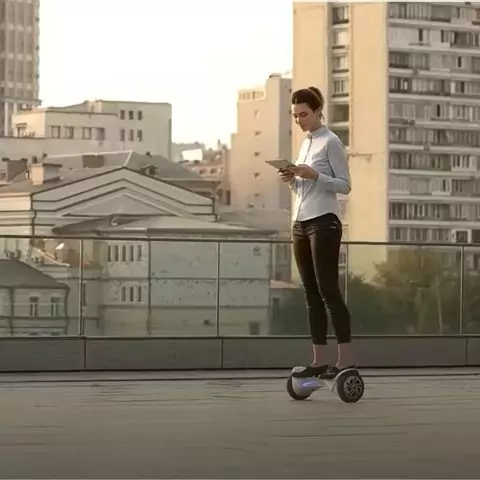
Most hoverboards come with a built-in self-balancing feature that makes it easy to stay upright while riding. However, if your hoverboard is not self-balancing, or if you want to calibrate it for precision riding, here’s how to do it:
1. Place the hoverboard on a flat surface and turn it on.
2. Place your feet on the foot pads and lean forward slightly until the wheels start to spin.
3. Keep your weight evenly distributed between both feet as you ride forward and backward slowly, allowing the wheels to spin faster or slower as needed.
4. If at any point during this process you feel unstable or off-balance, be sure to stop and try again later.
With practice, you’ll be able to fine-tune your balance and control over the hoverboard.
FAQs
How do I calibrate my hoverboard?
To calibrate your hoverboard, start by placing it on a flat surface. Turn it on and make sure it’s in calibration mode. Next, step onto the foot pads and remain still. The hoverboard will start to level itself out. Wait until the lights on the hoverboard stop flashing and remain solid. This means that the hoverboard is now calibrated and ready for use.
What do I do if my hoverboard is still not working properly after calibration?
If your hoverboard is still not working properly after calibration, there are a few things you can try. First, make sure that the foot pads are clean and free of debris. Next, check the tire pressure and make sure that it’s at the recommended level. You can also try resetting the hoverboard by turning it off and then back on again. If none of these solutions work, it’s best to contact the manufacturer or a professional repair service for further assistance.
Hoverboard Red Light-How To Calibrate your Hoverboard
Conclusion
Hoverboards are a lot of fun, but they can be tricky to ride. If you’re having trouble staying on your board, it might be because it’s not properly calibrated. In this post, we’ll show you how to calibrate your hoverboard so you can get back to enjoying your rides. The first step is to make sure that the hoverboard is turned off. Next, you’ll need to find the two calibration screws on the underside of the board. Once you’ve found them, use a Phillips head screwdriver to turn each one clockwise until they’re both tight. Now it’s time to test out your hoverboard. Turn it on and see if it’s easier to ride. If not, repeat the steps above until it is properly calibrated.

How would you reate my boobs?
[img]https://preview.redd.it/tuzss9qdloed1.jpeg?width=960&crop=smart&auto=webp&s=59c193f8aaa15e37919b919980380cc56c8f58d2[/img]
Your comment is awaiting moderation.
How would you reate my tits?
[img]https://preview.redd.it/8a37vub5fxbd1.jpeg?auto=webp&s=90cba546185d6f812b340b02c22c9a71996adca1[/img]
Your comment is awaiting moderation.
How would you reate my boobs?
[img]https://preview.redd.it/8a37vub5fxbd1.jpeg?auto=webp&s=90cba546185d6f812b340b02c22c9a71996adca1[/img]
Your comment is awaiting moderation.