To take the governor off a 150cc scooter, remove the restrictor plate or adjust the carburetor’s throttle. Looking to increase your 150cc scooter’s speed?
Taking off the governor can be a valuable modification. This article will guide you through the step-by-step process of removing the governor from your scooter, enabling you to achieve higher speeds and better performance. Whether you’re a scooter enthusiast or simply looking to enhance your daily commute, understanding how to remove the governor is essential.
By following this guide, you can unlock the full potential of your 150cc scooter and experience the thrill of increased speed and power. So, let’s dive into the details of how to take the governor off a 150cc scooter and enjoy a more exhilarating ride.
Contents
Governor Removal From 150cc Scooter
Are you considering removing the governor from your 150cc scooter? Understanding the process and potential risks before making any modifications is crucial. In this guide, we’ll delve into the purpose of the governor, the associated risks and considerations, and steps to take when removing it.
Understanding The Governor’s Purpose
The governor in a 150cc scooter is typically designed to limit the engine’s speed, ensuring safe and controlled operation. By restricting the maximum RPM (revolutions per minute), it can prevent the engine from over-revving, which may lead to excessive wear and potential hazards.
Risks And Considerations Before Removal
Prior to removing the governor from your 150cc scooter, it’s essential to weigh the potential risks and considerations involved. By making alterations to the engine’s speed limitation, you may compromise the manufacturer’s intended safety measures and could potentially void any existing warranties. Additionally, removing the governor may result in excessive wear on engine components and could impact the scooter’s overall performance.
Preparing For Governor Disassembly
Before you begin the process of removing the governor from your 150cc scooter, it’s crucial to prepare adequately. This involves gathering the necessary tools and equipment, as well as implementing safety precautions to ensure a smooth and secure disassembly process.
Gathering Necessary Tools And Equipment
When it comes to dismantling the governor of your 150cc scooter, having the right tools is essential. Here’s a list of tools and equipment you’ll need to have on hand:
- Socket Wrench Set: Ensure you have a variety of socket sizes to fit different bolts and nuts.
- Allen Wrench Set: These will be necessary for certain screws and bolts on your scooter.
- Pliers: Both needle-nose and regular pliers can come in handy for a variety of tasks.
- Screwdriver Set: Make sure to have both flat-head and Phillips head screwdrivers of various sizes.
- Adjustable Wrench: Useful for turning larger nuts and bolts.
- Shop Rags/Clean Cloths: These will help keep your work area clean and can also be used for wiping down parts.
- Penetrating Oil: Sometimes bolts and nuts can be stubborn. A good penetrating oil can help loosen them up.
Safety Precautions For The Process
Prior to beginning any disassembly work on your scooter, it’s imperative to take the appropriate safety precautions to protect yourself and ensure a successful and accident-free process. Here are some essential safety measures to follow:
- Wear Safety Gear: Always wear protective gear such as gloves and safety goggles to shield your eyes from any falling debris or oil.
- Ensure Stability: Before lifting or working on the scooter, ensure it’s placed on a stable and level surface to prevent any accidents or tipping over.
- Disconnect Battery: To avoid any electrical mishaps, disconnect the battery before commencing any work.
- Work in a Well-Ventilated Area: If working indoors, ensure the area is well-ventilated to prevent the buildup of fumes from any cleaning agents or fuels.
- Read the Manual: Always refer to your scooter’s manual for specific guidelines and safety information related to the disassembly process.
How To Take The Governor Off
When it comes to maximizing the speed and performance of a 150cc scooter, one common modification enthusiasts consider is removing the governor. The governor on a 150cc scooter limits the top speed to comply with regulations. However, many riders may want to remove the governor to unleash the full potential of their scooter. In this article, we will guide you through the process of taking the governor off your 150cc scooter, providing step-by-step instructions and essential tips to ensure a smooth modification.
Locating The Governor On The Scooter
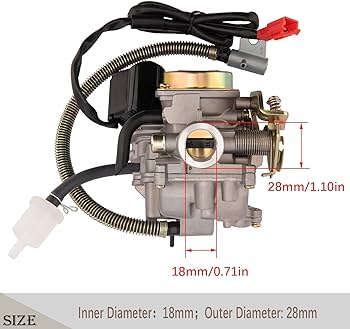
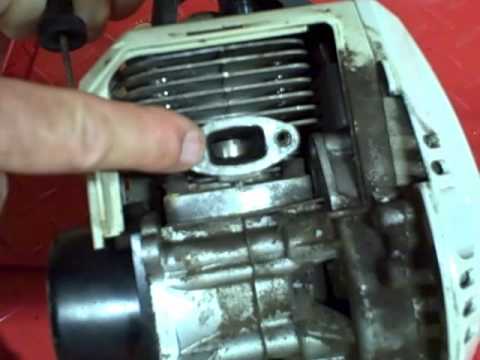
Before diving into the removal process, it’s crucial to understand where the governor is located on your 150cc scooter. The exact placement may vary depending on the scooter model and manufacturer. In most cases, the governor is situated near the engine, typically connected to the carburetor or throttle assembly. Refer to your scooter’s manual or seek guidance from a professional if you are unsure about the exact location of the governor.
Step-by-step Removal Instructions
Removing the governor from a 150cc scooter requires careful attention to detail and a methodical approach. Here are the step-by-step instructions to take off the governor:
- Begin by ensuring the scooter is turned off and the engine is cool to the touch.
- Locate the governor assembly near the engine and identify the components that need to be removed to access the governor.
- Using a suitable set of tools, carefully disconnect the throttle cable and any other linkages connected to the governor.
- Once the connections are detached, carefully unfasten the mounting bolts securing the governor in place.
- After removing the governor, inspect the surrounding area for any additional components or linkages that may need to be adjusted or reconnected.
- Reassemble any parts that were disconnected during the removal process, ensuring all connections are secure and properly reinstalled.
- Test the scooter to ensure the governor has been successfully removed and monitor its performance.
Tuning The Scooter Post-governor Removal
After removing the governor from your 150cc scooter, it’s crucial to properly tune the scooter to achieve optimum performance. Tuning ensures that the scooter runs efficiently and smoothly, allowing you to make the most of the increased speed and power. This involves adjusting the carburetor and fuel settings, as well as conducting test runs and performance checks to ensure everything is functioning as it should.
Adjusting Carburetor And Fuel Settings
Once the governor has been removed, the next step is to fine-tune the carburetor and fuel settings to accommodate the increased power output of the scooter. A rich fuel mixture may be required to achieve the ideal air-to-fuel ratio, enabling the engine to run at its best. This adjustment can enhance acceleration and overall performance.
Importance Of Test Runs And Performance Checks
After making adjustments, conducting several test runs is essential to assess the scooter’s performance. It allows you to identify any issues that may arise and make further adjustments if necessary. Testing the scooter in various conditions, such as uphill climbs and straight stretches, provides valuable insights into its performance. Additionally, performing thorough performance checks ensures that the scooter runs safely and efficiently post-governor removal.
Maintaining Scooter Performance
Maintaining the performance of your 150cc scooter is crucial for optimal functionality. When considering taking the governor off a 150cc scooter, it’s important to also understand the maintenance needed to ensure the scooter continues to perform at its best. Proper upkeep and regular tuning post-modification are essential for preserving the performance of your scooter.
Regular Upkeep And Tuning Post-modification
After removing the governor from your 150cc scooter, it is important to carry out regular maintenance and tuning to ensure that the scooter continues to perform at its best. This includes checking and adjusting the spark plug, cleaning or replacing the air filter, inspecting and maintaining proper tire pressure, and adjusting the carburetor if necessary. Additionally, regular oil changes and keeping the scooter clean from debris and dirt are crucial for its upkeep.
Signs Your Scooter Needs Professional Servicing
- Unusual engine noises or vibrations
- Loss of power or acceleration
- Inconsistent idling or stalling
- Difficulty starting the scooter
- Excessive exhaust smoke or unusual odors
If you notice any of these signs or experience a decline in overall scooter performance, it’s vital to seek professional servicing to address the issues promptly and prevent further damage.

Credit: www.amazon.com
Frequently Asked Questions For How To Take The Governor Off A 150cc Scooter
What Is The Purpose Of The Governor On A 150cc Scooter?
The governor limits the speed of the scooter for safety and regulatory compliance.
Is It Legal To Remove The Governor From A 150cc Scooter?
It’s important to check local laws and regulations before removing the governor from a scooter.
How Can I Take The Governor Off My 150cc Scooter?
Removing the governor involves accessing the engine and adjusting the throttle or ignition settings.
Conclusion
To wrap it up, taking the governor off a 150cc scooter can provide a thrilling experience for riders seeking more speed and power. By carefully following the steps and safety precautions outlined in this guide, you can enjoy the enhanced performance of your scooter without compromising your safety.
Make sure to stay informed and ride responsibly.