To bypass a 4 wire scooter ignition, connect the ignition switch power wire to the battery positive terminal and the ignition switch ground wire to the engine frame. This will bypass the ignition and power the scooter directly from the battery.
Scooters are popular means of transportation, offering convenience and cost-effectiveness. However, ignition issues can disrupt the smooth functioning of a scooter. If you find yourself in a situation where the ignition system is faulty, a temporary solution is to bypass the ignition.
By understanding the steps to bypass a 4 wire scooter ignition, you can quickly get your scooter back on the road. We’ll discuss the process of bypassing the ignition system and provide insights on the potential risks associated with this temporary fix. Let’s delve into the details of bypassing a 4 wire scooter ignition to ensure you have a comprehensive understanding of this procedure.
Contents
Scooter Ignition Basics
The ignition system of a scooter is crucial for starting and running the engine smoothly. Understanding the basics of scooter ignition, its components, and the role of 4 wire scooter ignition bypass is essential for troubleshooting and maintenance.
Understanding Ignition Systems
An ignition system in a scooter is responsible for initiating the combustion process, which powers the engine. It generates a high voltage spark at the spark plug, igniting the air-fuel mixture, thus enabling the engine to start and run.
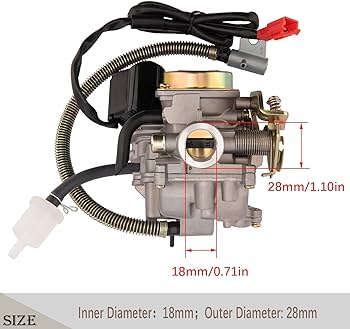
Components Of The Scooter Ignition
The scooter ignition system is comprised of several key components, including the ignition coil, spark plug, CDI unit (Capacitor Discharge Ignition), and the stator. These components work together to create and deliver the spark needed for ignition.
Role Of The 4 Wires In Ignition
The 4 wires in a scooter’s ignition system play a crucial role in ensuring proper ignition. Each wire serves a specific function, such as supplying power from the battery, carrying signals from the stator, or connecting to the CDI unit and ignition coil. Understanding the roles of these wires is important for diagnosing and bypassing ignition issues.
Credit: www.vmcchineseparts.com
4 Wire Scooter Ignition Bypass Explained
Understanding the ins and outs of a 4 wire scooter ignition bypass can be a valuable troubleshooting tool for scooter owners. By comprehending the circumstances that warrant a bypass and the benefits it offers, you can ensure a hassle-free experience with your scooter. In this blog post, we’ll delve into the details of 4 wire scooter ignition bypass, including when and why you might consider it as a viable solution for your scooter’s ignition issues. Let’s start by exploring how bypassing can serve as a troubleshooting method.
Bypassing As A Troubleshooting Method
When facing ignition problems with your scooter, bypassing the ignition system can act as an effective troubleshooting method. By bypassing the 4 wire scooter ignition, you can isolate the source of the issue and determine whether the problem lies within the ignition system itself or elsewhere in the scooter’s electrical system. This can help in identifying and addressing the root cause of the problem, leading to a quick and accurate resolution.
Circumstances For Considering A Bypass
There are certain circumstances where considering a 4 wire scooter ignition bypass becomes essential. If you encounter situations where the ignition switch or ignition wiring is faulty or malfunctioning, bypassing the ignition system can offer a temporary solution to allow the scooter to start and run. Additionally, if you suspect issues with the ignition system and need to assess its functionality, a bypass can help in diagnosing the problem effectively.
Step-by-step Bypass Guide
Tools And Materials Needed
- 4-Wire Ignition Switch Bypass Diode
- Wire cutter/stripper
- Electrical tape
- Phillips screwdriver
- Needle-nose pliers
Safety Precautions Before Starting
- Ensure the scooter is turned off and the key is removed from the ignition
- Wear safety goggles to protect your eyes from any potential sparks
- Work in a well-ventilated area to avoid inhaling harmful fumes
Before proceeding with the bypass, it’s vital to prioritize safety by adhering to the necessary precautions. Disconnecting the scooter’s battery is a critical step that should be executed with care to prevent accidents or damage to the scooter’s electrical components.
Disconnecting The Battery
- Locate the battery compartment on your scooter
- Use the Phillips screwdriver to remove the screws holding the compartment cover in place
- Identify the positive (+) and negative (-) terminals of the battery
- Use the appropriate tool to loosen the nuts securing the battery terminals
- Once the terminals are loosened, carefully disconnect the negative (-) terminal first, followed by the positive (+) terminal
By following these steps, you’ll effectively prepare the scooter for the ignition bypass procedure and ensure a safe working environment.
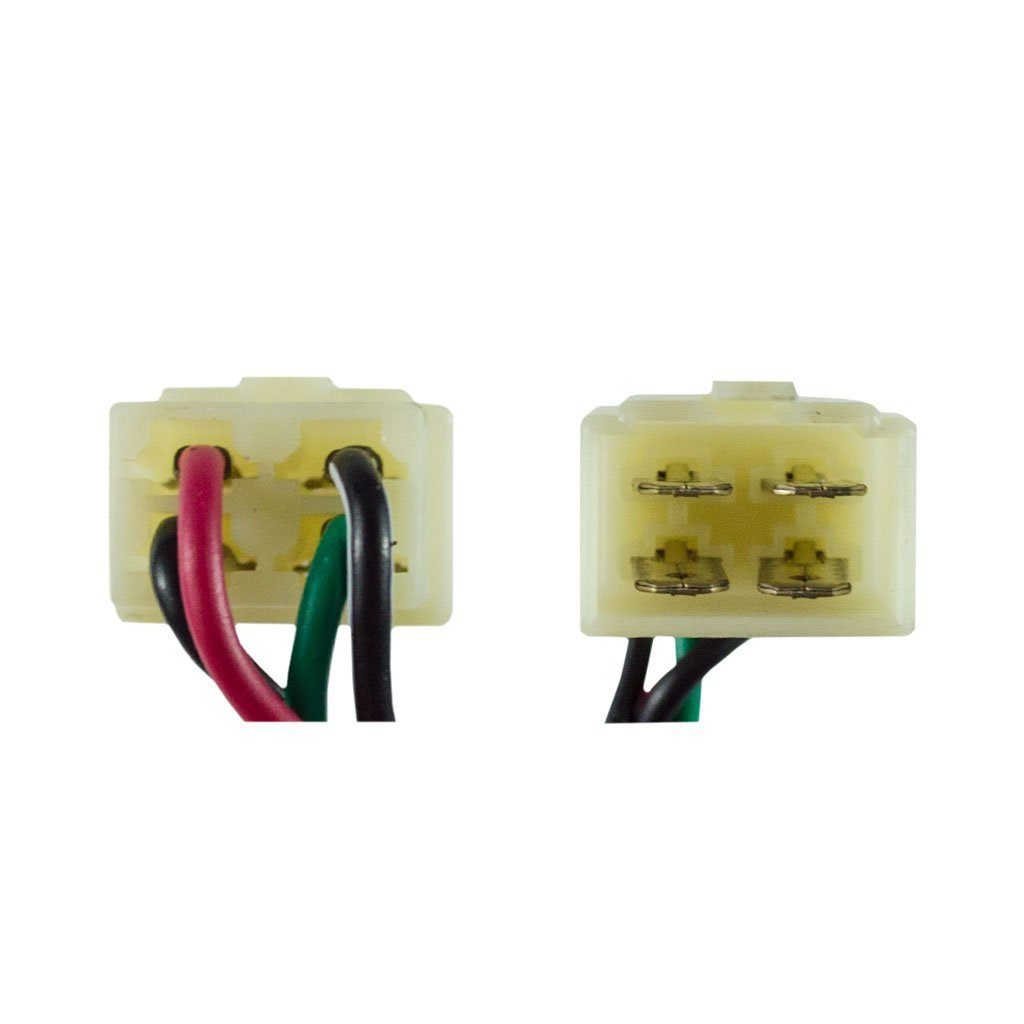
Identifying The Ignition Wires
When working on a 4 wire scooter ignition bypass, understanding how to identify the ignition wires is crucial for a successful bypass process. By knowing the color-coding and wire functions, as well as testing wire connectivity, you can ensure that the bypass is carried out effectively.
Color-coding And Wire Functions
Each wire within the ignition system serves a specific function and is identified by a unique color code. Understanding the color-coding and wire functions is essential for identifying the ignition wires correctly:
- Red wire: Typically the power supply wire, providing electrical power to the ignition system.
- Black wire: Often the ground wire, responsible for completing the electrical circuit and returning current to the battery.
- Blue wire: Often connected to the ignition coil, which plays a role in producing the spark for ignition.
- Green wire: Usually connected to the kill switch, which is designed to stop the engine.
Testing Wire Connectivity
Before proceeding with the ignition bypass, it is important to test the connectivity of the ignition wires to ensure proper functionality. This can be done using a multimeter to check for continuity and verify that each wire is carrying the appropriate electrical signals.
Wiring The Ignition Bypass
When wiring the ignition bypass for your 4 wire scooter, it’s important to follow the correct steps to ensure a secure and reliable connection. This process involves stripping wire ends, connecting wires correctly, and securing the connections. By following these steps, you can effectively bypass the ignition and start your scooter without a key.
Stripping Wire Ends
Before you can begin connecting the wires, you’ll need to strip the insulation from the ends of the wires. Use a wire stripper tool to carefully remove the outer insulation, exposing the bare wire underneath. Be sure to strip an appropriate length of insulation to ensure a strong connection.
Connecting Wires Correctly
Once the wire ends are stripped, it’s time to connect the wires correctly. This may involve matching colors or using a multimeter to identify the appropriate connections. Make sure to twist the bare wire ends together securely, ensuring a strong and reliable connection.
Securing Connections
After the wires are connected, it’s crucial to secure the connections to prevent them from coming loose. Use electrical tape or heat shrink tubing to cover and insulate the exposed wire connections. This will protect them from moisture and prevent accidental short-circuits.
Troubleshooting Post-bypass
After successfully bypassing the 4 wire scooter ignition, it is important to troubleshoot any issues that may arise post-bypass. Identifying common issues and ensuring a successful bypass will help maintain the functionality and safety of your scooter.
Common Issues After Bypassing
Several common issues may arise after bypassing the 4-wire scooter ignition. These issues can include:
- Difficulty starting the scooter
- Inconsistent or erratic power delivery
- Unresponsive electric components
How To Check For Successful Bypass
Ensuring a successful bypass is crucial for the overall functionality of the scooter. To check for a successful bypass, follow these steps:
- Verify proper wiring connections
- Test the ignition switch for continuity
- Ensure consistent power delivery to the ignition system
- Test the functionality of electric components, such as lights and horn
- Confirm smooth and consistent engine start-up
Ensuring Scooter Safety
When it comes to modifying a scooter’s ignition system, safety is of utmost importance. While some may consider bypassing the ignition on a 4-wire scooter as a way to simplify starting the vehicle, it’s crucial to understand the potential risks involved. From long-term effects to legal and warranty considerations, ensuring the safety of the scooter and its rider is essential.
Long-term Effects Of An Ignition Bypass
An ignition bypass can have significant long-term effects on the scooter. By tampering with the original ignition system, the reliability of the scooter may be compromised. Alterations to the electrical connections can lead to unforeseen issues such as electrical breakdowns, affecting the overall performance of the scooter. Additionally, a bypass may also impact the safety features integrated with the ignition system, posing potential risks to the rider.
Legal And Warranty Considerations
Before proceeding with an ignition bypass, it’s essential to consider the legal and warranty implications. Most jurisdictions have strict regulations governing modifications to a vehicle’s ignition system. Engaging in an unauthorized modification may lead to legal repercussions and even void warranties provided by the manufacturer. Therefore, it’s crucial to be aware of the legal constraints and potential warranty implications before performing an ignition bypass on a scooter.
Frequently Asked Questions Of 4 Wire Scooter Ignition Bypass
What Is A 4 Wire Scooter Ignition Bypass?
A 4 wire scooter ignition bypass is a process of overriding the standard ignition system to start a scooter without using a key. It can be helpful if the original ignition system is faulty or if you’ve lost the key.
How Does A 4 Wire Scooter Ignition Bypass Work?
The 4 wire scooter ignition bypass works by directly connecting the necessary wires in the ignition system to simulate the action of the key. By bypassing the standard ignition process, the scooter can be started without requiring the key.
What Are The Risks Of Performing A 4 Wire Scooter Ignition Bypass?
Performing a 4 wire scooter ignition bypass can have potential risks, including bypassing important safety features and making your scooter more susceptible to theft. It’s important to weigh these risks before attempting to bypass the ignition system.
Is It Legal To Do A 4 Wire Scooter Ignition Bypass?
The legality of performing a 4 wire scooter ignition bypass can vary depending on your location and local laws. It’s crucial to research and understand the legal implications and consequences before attempting to bypass the ignition system on your scooter.
Conclusion
In summation, bypassing the ignition on a 4-wire scooter can offer a solution when troubleshooting issues. Understanding the process and safety precautions are crucial before attempting this technique. With a mindful approach, you can address ignition problems effectively. Explore further resources for insightful guidance on scooter maintenance and repairs.