Are you experiencing issues with your mobility scooter’s battery? As a mobility scooter user, it’s essential to understand how to replace the battery to ensure optimal performance and independence.
To replace the battery in your mobility scooter, first disconnect the negative (-) lead from the battery. Next, remove the seat and any other panels that may be blocking access to the battery. Once you have access to the battery, remove the old battery and install the new one in its place. Finally, reconnect the negative (-) lead to the new battery and replace any panels or seats that were removed.
- Locate the battery cover on your mobility scooter.
- This is usually located under the seat.
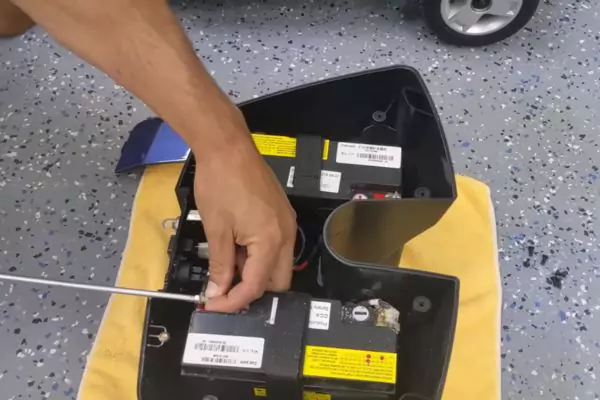
- Use a screwdriver to remove the screws that hold the battery cover in place.
- Lift up the battery cover and set it aside.
- Disconnect the negative (black) terminal first, then disconnect the positive (red) terminal from the old battery.
- Remove the old battery from your mobility scooter and set it aside.
- Make sure to dispose of it properly according to local regulations.
- Install the new battery in your mobility scooter, connecting the positive (red) terminal first, then connecting the negative (black) terminal last.
- Be sure that both terminals are securely connected to avoid any potential accidents or damage to your scooter.
- If needed, consult your owner’s manual for specific instructions on installing a new battery in your model of mobility scooter.
- Some models may require special tools or batteries.
Contents
- 1 Understanding the Battery in a Mobility Scooter
- 2 Signs of a Failing Battery
- 3 Tools and Materials Needed for Battery Replacement
- 4 A Step-by-step Guide to Replacing The Battery
- 5 How Do You Put Batteries in a Mobility Scooter?
- 6 Tips for Maintaining the Battery Life
- 7 FAQs
- 8 Changing Mobility Scooter Batteries Tutorial
- 9 Final Thoughts
Understanding the Battery in a Mobility Scooter
Before we proceed with the battery replacement process, let’s gain a basic understanding of the battery used in a mobility scooter. Most mobility scooters utilize rechargeable deep-cycle batteries, typically sealed lead-acid (SLA) or lithium-ion (Li-ion) batteries. These batteries provide the necessary power to operate the scooter’s motor, lights, and other electrical components.
Signs of a Failing Battery
Identifying the signs of a failing battery is crucial for determining whether it’s time to replace it. Here are a few common indicators that your mobility scooter’s battery may need replacement:
- Decreased range: If you notice a significant decrease in the distance your scooter can travel on a single charge, it could be due to a deteriorating battery.
- Longer charging times: If the battery takes longer to charge fully or doesn’t hold a charge as long as it used to, it may be a sign of an aging battery.
- Difficulty starting: If your mobility scooter struggles to start or experiences intermittent power issues, it could be due to a faulty battery.
- Physical damage: Inspect the battery for any visible signs of damage, such as leaks, bulges, or corrosion. Such issues may require immediate replacement.
Tools and Materials Needed for Battery Replacement
Before replacing the battery in your mobility scooter, gather the necessary tools and materials. Here’s a list of items you’ll likely need:
- New battery (make sure it’s compatible with your mobility scooter)
- Safety goggles and gloves
- Adjustable wrench or pliers
- Battery terminal cleaner or baking soda and water solution
- Wire brush or sandpaper
- Battery terminal protectors (optional)
- Towel or rag
A Step-by-step Guide to Replacing The Battery
Now that you have the required tools and materials, let’s proceed with the battery replacement process. Follow these steps carefully to ensure a safe and successful battery replacement:
Step 1: Safety precautions
Prioritize safety by wearing your safety goggles and gloves throughout the process. Mobility scooter batteries contain corrosive materials, so taking proper precautions is essential.
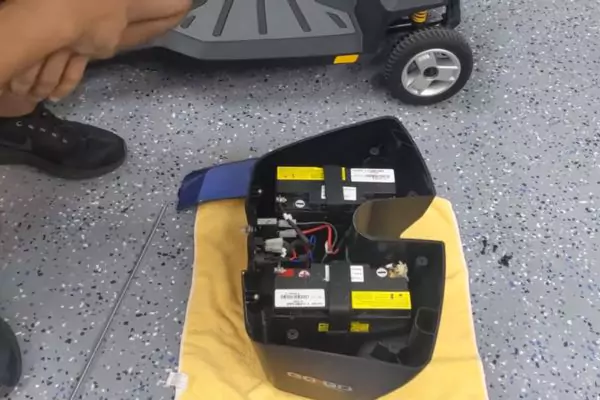
Step 2: Removing the old battery
- Turn off your mobility scooter and remove the key from the ignition.
- Locate the battery compartment, usually found beneath the scooter’s seat.
- Using an adjustable wrench or pliers, disconnect the battery cables by loosening the terminal nuts. Start with the negative (-) terminal followed by the positive (+) terminal.
- Carefully lift the old battery out of the compartment and place it on a stable surface.
Step 3: Preparing the new battery
- Inspect the new battery for any damage during shipping or storage. If there are any concerns, contact the supplier or manufacturer.
- Clean the battery terminals using a battery terminal cleaner or a mixture of baking soda and water. Use a wire brush or sandpaper to remove any corrosion or dirt.
- Apply a thin layer of petroleum jelly or battery terminal protector to the clean battery terminals to prevent corrosion.
Step 4: Installing the new battery
- Lift the new battery and position it correctly in the battery compartment. Ensure the positive (+) and negative (-) terminals align with the corresponding cables.
- Reconnect the battery cables, starting with the positive (+) terminal followed by the negative (-) terminal. Tighten the terminal nuts securely but avoid over-tightening.
- Double-check the connections to ensure they are secure and free of any loose cables.
Step 5: Testing the new battery
- Turn on your mobility scooter and test its functionality. Ensure all electrical components, such as lights and indicators, are working correctly.
- Take a short test ride to verify that the scooter’s motor and overall performance are functioning as expected.
- If everything is in order, congratulations! You have successfully replaced the battery in your mobility scooter.
How Do You Put Batteries in a Mobility Scooter?
If you need to put batteries in a mobility scooter, there are a few things you need to know. First, make sure the scooter is turned off and unplugged. Next, locate the battery compartment – this is usually under the seat or in front of the scooter.
Once you’ve found it, open the compartment and remove any old or damaged batteries. Now it’s time to install the new batteries. Start by connecting the positive (red) terminal of the first battery to the positive terminal of the second battery.
Then, connect the negative (black) terminal of the first battery to the negative terminal of the second battery. Finally, close up the battery compartment and plug in your scooter – now it should be ready to go!
Tips for Maintaining the Battery Life
To prolong the lifespan and maximize the performance of your mobility scooter’s battery, consider the following tips:
- Charge the battery regularly: Follow the manufacturer’s instructions regarding the charging frequency and duration to maintain optimal battery health.
- Avoid overcharging: Once the battery is fully charged, unplug the charger promptly to prevent overcharging, which can lead to premature battery degradation.
- Store the scooter properly: If you won’t be using the mobility scooter for an extended period, store it in a cool and dry place, preferably with the battery partially charged.
- Keep the battery clean: Regularly clean the battery terminals and remove any dirt or corrosion to maintain good electrical connections.
- Consult the user manual: Refer to the user manual provided with your mobility scooter for specific maintenance guidelines and recommendations.
FAQs
Can I use any type of battery for replacement?
It’s crucial to use a battery that is compatible with your mobility scooter’s specifications. Refer to the user manual or consult the scooter manufacturer or supplier to ensure you select the correct battery type and size for your specific model.
Can I replace the battery myself or should I seek professional help?
Battery replacement can typically be done by following the manufacturer’s instructions and with basic tools. However, if you are unsure or uncomfortable with the process, it’s advisable to seek professional assistance from a qualified technician or mobility scooter dealer.
How long does it take to charge the new battery?
The charging time for a new battery varies depending on its capacity and the charger’s specifications. Refer to the manufacturer’s guidelines for an estimated charging time. As a general rule, it’s recommended to charge the battery until it reaches full capacity before using your mobility scooter.
How Do You Fix a Mobility Scooter Battery That Won’T Charge?
If you have a mobility scooter battery that won’t charge, there are a few things you can do to try and fix the issue. First, check the battery terminals to make sure they are clean and free of corrosion. Next, check the charging port on the scooter for any debris or damage that could be causing the issue.
Changing Mobility Scooter Batteries Tutorial
Final Thoughts
Assuming you would like a summary of the blog post titled “How to Replace Battery in Mobility Scooter”: The blog post explains how to replace the battery in a mobility scooter. First, the author notes that it is important to have the right tools for the job, including a screwdriver, socket wrench set, and pliers.
Next, they explain how to disconnect the old battery and remove it from the scooter. Finally, they provide instructions on how to install the new battery and reconnect all of the wires.