To remove a stripped oil drain plug, use a bolt extractor or drill to remove the plug. First, ensure the car is securely lifted, and then use the extracted or drilled location to install a new plug.
Proper care is vital to avoid any further damage to the drain pan or oil pan. It is common to face this issue, and it is essential to tackle it carefully to avoid any added complications. We will discuss the steps to remove a stripped oil drain plug and provide some tips for preventing this issue in the future.
Understanding the correct process can save time and money, making it an important skill for any car owner.
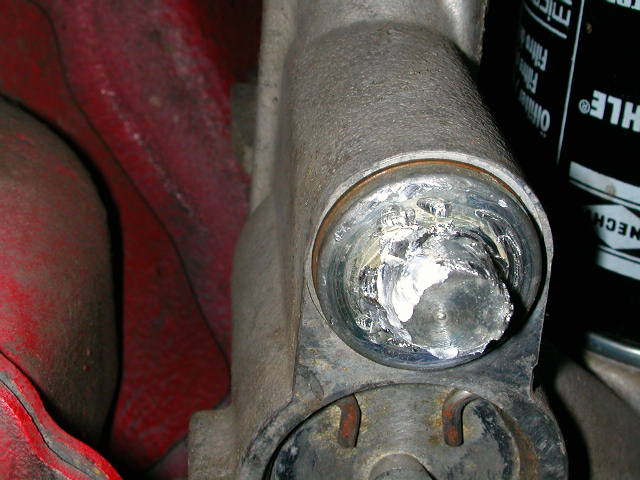
Credit: rennlist.com
Contents
Stripped Oil Drain Plug Predicament
Dealing with a stripped oil drain plug can be a frustrating and daunting task for any vehicle owner. Whether it’s due to over-tightening, improper tools, or simply wear and tear, a stripped oil drain plug poses a significant challenge. However, understanding the challenge faced, the consequences of a stripped drain plug, and the importance of correct removal techniques can help mitigate the issue effectively.
Understanding The Challenge Faced
When the threads on an oil drain plug are damaged, it becomes exceedingly difficult to remove the plug. This can lead to oil leaks, potential engine damage, and significant inconvenience for the vehicle owner. The challenge lies in finding a safe and effective method to extract the stripped plug without causing further harm to the oil pan or surrounding components.
Consequences Of A Stripped Drain Plug
A stripped oil drain plug can result in oil leaks, leading to a drop in oil pressure and potential engine damage. Moreover, the continuous loss of oil can eventually cause the engine to seize, resulting in costly repairs. Additionally, driving with a compromised drain plug can lead to environmental hazards due to oil spills on roadways.
Importance Of Correct Removal Techniques
Using the correct removal techniques is crucial to avoid exacerbating the situation. Employing improper tools or methods can worsen the damage to the oil pan and create further complications. Therefore, understanding the appropriate extraction procedures and utilizing the right tools is essential to safely and efficiently remove the stripped oil drain plug.
Identifying A Stripped Oil Drain Plug
Identifying a stripped oil drain plug is crucial for maintaining the health of your vehicle’s engine. It can be a common issue that arises during routine oil changes, causing leaks and potential damage if left unaddressed. Spotting the signs of stripping, diagnosing the extent of damage, and determining whether a DIY fix is feasible are essential steps in addressing this problem.
Spotting The Signs Of Stripping
When examining your oil drain plug, visual indicators of stripping may include rounded edges, visible wear, or difficulty securing a socket onto the plug. A damaged or stripped drain plug may also lead to oil seepage around the plug, signaling a potential problem.
Diagnosing The Extent Of Damage
Upon closer inspection, it’s crucial to determine the severity of the stripping. Nicks and grooves along the threads, excessive wear, or a loose fit are clear signs of significant damage. Additionally, examining the drain pan for metal shavings can further confirm the extent of the issue.
Preliminary Assessment For Diy Suitability
If you’re considering a DIY solution, assess the feasibility by gauging your experience level and access to tools. A less severe case of stripping may be manageable with the right approach, but extensive damage may require professional intervention to prevent further complications.
Preparing For Removal Process
Before attempting to remove a stripped oil drain plug, it is essential to prepare for the process to ensure safety and efficiency. This involves gathering essential tools and materials, setting up a safe working environment, and positioning the vehicle to ensure stability.
Gathering Essential Tools And Materials
It is crucial to have the necessary tools and materials on hand before starting the removal process. The following items are essential for this task:
- Socket wrench set – to fit the size of the oil drain plug
- Penetrating lubricant – to help loosen the stripped plug
- Oil drain pan – to catch the oil when the plug is removed
- Replacement oil drain plug – in case the original one is damaged beyond repair
Setting Up A Safe Working Environment
Prioritize safety by setting up a safe working environment. This includes:
- Working on a level surface – to prevent the vehicle from rolling or shifting during the procedure
- Wearing protective gloves and eyewear – to protect against any potential hazards
- Using jack stands or ramps – to elevate the vehicle for easier access to the oil drain plug
Positioning Vehicle And Ensuring Stability
Properly positioning the vehicle is crucial to ensure stability throughout the removal process. Follow these steps when positioning the vehicle:
- Engage the parking brake – to prevent the vehicle from moving
- Chock the wheels – to further secure the vehicle in place
- Use jack stands or ramps – to elevate the vehicle for better access to the oil drain plug
How To Remove Stripped Drain Plug
Dealing with a stripped oil drain plug can be a frustrating and time-consuming task. However, with the right knowledge and tools, it can be resolved without the need for costly repairs or replacements.
Selecting The Right Method For Your Situation
Before embarking on the journey of removing a stripped oil drain plug, it’s crucial to assess the situation and choose the appropriate method based on the level of damage. The efficacy of the method will largely depend on the extent of stripping and accessibility to the plug.
Step-by-step Guide To Manual Removal Techniques
When confronted with a stripped oil drain plug, manual removal techniques can often be the initial approach. This method can involve the use of basic tools and careful maneuvers to dislodge the plug.
- Start by applying penetrating oil to the stripped drain plug and allow it to sit for a few minutes to loosen the threads.
- Using a suitable wrench, carefully attempt to turn the plug counterclockwise. Apply steady and gentle pressure to avoid causing further damage.
- If the plug refuses to budge, consider utilizing a breaker bar to provide added leverage, taking caution not to exert excessive force that could exacerbate the situation.
- If successful, carefully remove the drain plug and proceed with the necessary maintenance.
Employing Specialty Tools For Stubborn Cases
In instances where the stripped oil drain plug proves to be exceptionally stubborn, the utilization of specialty tools may be the most effective solution. These tools are specifically designed to tackle challenging removal scenarios, offering a higher likelihood of success without causing extensive damage to the oil pan.
Aftercare And Prevention Tips
Proper Reinstallation Of Oil Drain Plug
When reinstalling the oil drain plug, it’s crucial to ensure a proper and secure fit. Make sure to clean the threads of both the drain plug and the oil pan to remove any debris or metal shavings that could interfere with the sealing process. Use a torque wrench to tighten the drain plug to the manufacturer’s recommended torque specifications. This will prevent over-tightening, which can lead to stripping, as well as under-tightening, which can cause leaks.
Choosing The Right Replacement Plug
When replacing a stripped oil drain plug, it’s important to select the appropriate replacement. Consider using a self-tapping oversized drain plug, a threaded insert, or a replacement oil drain pan. These alternatives can provide a secure and long-term solution to the stripped drain plug issue. Always ensure that the new plug matches the specifications and thread size of the oil pan to guarantee a proper fit.
Preventive Practices For Future Maintenance
- Regularly inspect the oil drain plug for signs of damage or wear during routine oil changes.
- Use a torque wrench to apply the correct torque when reinstalling the drain plug.
- Consider using a high-quality synthetic or blended oil, which can reduce the likelihood of sludge buildup and corrosion, decreasing the risk of stripped drain plugs.
- Replace the crush washer or gasket with each oil change to ensure a proper seal and prevent leaks.
- Keep the oil pan and surrounding area clean to avoid debris and contaminants that could lead to damage or stripping.
Frequently Asked Questions For How To Remove Stripped Oil Drain Plug
How Do I Know If My Oil Drain Plug Is Stripped?
To check for a stripped oil drain plug, look for visible damage, such as rounded or flattened edges. You may also notice oil leaks around the plug. If you experience difficulty tightening or loosening the plug, it could be a sign of stripping.
Can I Reuse A Stripped Oil Drain Plug?
It’s not recommended to reuse a stripped oil drain plug. A stripped plug can lead to further damage or oil leaks. It’s best to replace the plug with a new one to ensure a proper seal and prevent future issues.
What Tools Do I Need To Remove A Stripped Oil Drain Plug?
You may need tools such as a tap and die set, an extractor socket, or a pipe wrench to remove a stripped oil drain plug. Additionally, penetrating oil can help loosen the plug. Always use caution and ensure the proper tools for the job.
What Are The Consequences Of Not Fixing A Stripped Oil Drain Plug?
Neglecting a stripped oil drain plug can lead to oil leaks, which may result in engine damage and potential safety hazards. It’s essential to address this issue promptly to maintain the integrity of your vehicle’s oil system.
Conclusion
Dealing with a stripped oil drain plug can be a frustrating situation, but with the right tools and techniques, it can be successfully resolved. By following the steps outlined in this post, you can effectively remove a stripped oil drain plug and prevent any further complications.
Remember to always exercise caution and seek professional help if needed.