To clean jets on a carburetor, first, remove the carburetor from the engine and disassemble it. Then, soak the jets in a carburetor cleaner solution and clean them with a small wire or compressed air to remove any debris or clogs.
Proper maintenance of your carburetor is crucial for the smooth functioning of your engine. Over time, the jets on the carburetor can get clogged with dirt, debris, or old fuel, leading to poor engine performance. To ensure maximum efficiency and performance, it’s essential to clean the jets regularly.
We will discuss the steps to thoroughly clean the jets on a carburetor, helping you maintain your engine’s optimal performance and longevity. Following these steps will ensure that your carburetor continues to function at its best, preventing any potential issues and extending the life of your engine.
Contents
Preparing For Carburetor Cleaning
Before diving into the process of cleaning the jets on your carburetor, it’s crucial to ensure you have everything in place for a smooth and efficient cleaning session. Preparing for carburetor cleaning involves gathering the necessary tools and supplies, setting up a well-lit and ventilated workspace, and considering important safety precautions. By taking these initial steps, you can facilitate the cleaning process and ensure optimal results for your carburetor.
Gather Necessary Cleaning Tools And Supplies
- Carburetor cleaner: Ensure to use a quality carburetor cleaner that is compatible with your specific carburetor.
- Wire brushes: Different sizes of wire brushes will help in removing debris and buildup from the jets.
- Compressed air: Use compressed air to thoroughly clean out the jets and passages.
- Gloves and eye protection: Protect yourself from chemical exposure and debris when handling the carburetor.
- Clean rags: Use clean rags to wipe down the carburetor and components.
- Container for soaking: A container to soak the carburetor components in the cleaner.
Importance Of A Well-lit And Ventilated Workspace
Creating a well-lit and ventilated workspace for carburetor cleaning is essential for safety and efficiency. Adequate lighting ensures that you can see small components and areas within the carburetor clearly, helping you to identify any issues or buildup. A well-ventilated area helps to dissipate any fumes from the cleaning products, protecting your respiratory health. It also ensures that the carburetor components dry properly before reassembly.
Safety Precautions To Consider
- Turn off the engine: Ensure that the engine is turned off and has cooled down before starting the cleaning process.
- Dispose of chemicals properly: Handle and dispose of the carburetor cleaner and other chemicals according to the manufacturer’s guidelines to prevent environmental harm.
- Avoid open flames: Keep the cleaning area away from open flames or sources of ignition, as carburetor cleaner is highly flammable.
- Work in a well-ventilated area: Always work in a well-ventilated space to avoid inhaling harmful fumes and ensure proper airflow.
- Wear protective gear: Use gloves and eye protection to safeguard against chemical exposure and debris during the cleaning process.
Identifying Carburetor JetsIdentifying Carburetor Jets
Carburetor jets play a crucial role in regulating the air-fuel mixture in an engine’s carburetor. Cleaning and maintaining these jets is essential for optimal engine performance. Proper identification of the jets is the first step towards ensuring effective maintenance. In this section, we will explore the different types of jets in a carburetor and provide guidance on locating and differentiating between the main and pilot jets.
Types Of Jets In A Carburetor
Carburetor jets come in various types, each serving a specific function in the fuel delivery process. The main types of jets found in a typical carburetor include:
- Main jets
- Pilot jets
- Needle jets
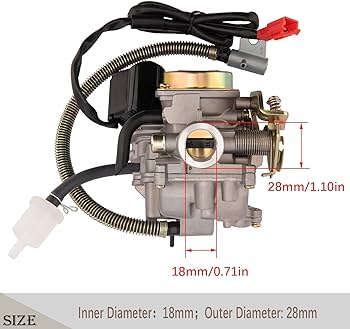
Locating The Jets For Cleaning
Before cleaning the jets, it’s crucial to locate their positions within the carburetor. Most carburetors have easily accessible jet locations, typically located near the bottom of the carburetor bowl. To identify the jets accurately, it’s recommended to refer to the manufacturer’s manual for specific guidance on jet locations.
Differentiating Between Main And Pilot Jets
Understanding the distinction between main and pilot jets is vital for targeted cleaning. Main jets are responsible for fuel delivery at higher engine speeds, while pilot jets regulate the fuel mixture at lower speeds and idle. Differentiating between these jets can be done by inspecting their sizes and positions within the carburetor body, as outlined in the manufacturer’s manual.
How To Clean Jets On Carburetor
Step-by-step Disassembly Of The Carburetor
To begin cleaning the jets on a carburetor, careful disassembly of the carburetor is essential. Start by removing the carburetor from the engine and then gently disassemble it, ensuring that all parts are organized and kept in a safe place to avoid misplacement.
Tips For Handling Jets And Small Components
When handling jets and other small components, it’s crucial to work in a clean, well-lit area. Use a well-organized workspace and be gentle to avoid damaging the sensitive parts. Additionally, use the appropriate tools and keep components organized to facilitate reassembly.
Techniques For Cleaning Without Damage
Using a carefully selected carburetor cleaner and small, precise cleaning tools, such as a thin wire or jet cleaning tool, gently remove the accumulated debris from the jets without causing damage. Prioritize thorough yet gentle cleaning to ensure optimal performance without the risk of causing harm to the components.
Choosing The Right Cleaning Solvents
When it comes to cleaning the jets on a carburetor, choosing the right cleaning solvents is crucial for effective maintenance. Different cleaning agents have their pros and cons, and it’s essential to understand how to use them effectively to achieve optimal results. Additionally, alternative cleaning methods can also be considered for a thorough cleaning process.
Pros And Cons Of Different Cleaning Agents
Here’s a comparison of various cleaning agents commonly used for cleaning carburetor jets:
| Cleaning Agent | Pros | Cons |
|---|---|---|
| Carburetor Cleaner | Effective in removing varnish and carbon deposits | May contain strong chemicals |
| Denatured Alcohol | Gentle on carburetor components | May not effectively remove stubborn deposits |
| Vinegar Solution | Natural and eco-friendly | May require longer soaking time for deep cleaning |
How To Use Carburetor Cleaner Effectively
When using a carburetor cleaner, ensure to follow these steps for optimal results:
- Start by removing the carburetor from the engine for thorough cleaning.
- Spray the cleaner directly into the jets, ensuring complete coverage.
- Allow the cleaner to sit for the recommended time as per the product instructions.
- Use a small brush to gently scrub the jet openings to dislodge any stubborn deposits.
- Rinse the jets with clean water to remove the cleaner and debris.
Alternative Cleaning Methods
In addition to traditional cleaning agents, alternative methods can also be effective for cleaning carburetor jets:
- Ultrasonic Cleaning: Utilizing an ultrasonic cleaner can provide thorough and efficient cleaning of carburetor jets.
- Manual Soaking: Immersing the carburetor components in a mixture of warm water and a gentle solvent can help dissolve deposits.
- Compressed Air: Using compressed air can help dislodge debris from the jets, providing a quick cleaning solution.
Reassembling After Cleaning
After cleaning the jets on your carburetor, reassembling the components properly is crucial to ensure the optimal functioning of the engine. In this section, we will discuss the essential steps and precautions for reassembling the carburetor after cleaning, including the inspection before reassembly, proper installation of jets, and precautions to ensure optimal performance.
Inspection Before Reassembly
Before reassembling the carburetor, it’s essential to inspect the jets and other components for any signs of damage or wear. Check for any clogs or debris that may have been missed during the cleaning process. Ensure that all the parts are clean and free of any contaminants that could affect the performance of the carburetor.
Proper Installation Of Jets
When reinstalling the jets, it’s crucial to ensure that they are installed in the correct position and orientation. Refer to the manufacturer’s specifications or service manual for the precise placement of each jet. Avoid over-tightening the jets, as this can cause damage to the threads or the internal components of the carburetor.
Precautions To Ensure Optimal Performance
After reassembling the carburetor, it’s essential to conduct a thorough check to ensure that all the components are securely fastened and in proper working condition. Test the throttle response and idle speed to verify that the carburetor is functioning correctly. Additionally, conduct a visual inspection for any signs of leaks or irregularities.
I hope, it helps. Let me know if you need any changes.

Fine-tuning And Testing
After thorough cleaning of the jets on your carburetor, the next crucial step is fine-tuning and testing to ensure optimal performance. Proper adjustment of the jets, testing for functionality, and being vigilant for any trouble signs are essential for a well-maintained carburetor.
Adjusting Jets After Cleaning
Once the jets on the carburetor are cleaned, it is vital to readjust them to ensure the proper air-fuel mixture. Turn the adjustment screws gently to achieve the ideal setting, as per the manufacturer’s specifications. After making the adjustments, it’s time for testing the carburetor’s functionality.
Methods For Testing Carburetor Functionality
Testing the functionality of the carburetor can be done using various methods:
- Performing a visual inspection for any leaks or irregularities.
- Conducting airflow tests to ensure unrestricted airflow through the jets.
- Utilizing a vacuum gauge to assess the vacuum levels and detect any abnormalities.
Trouble Signs To Watch Out For During Testing
During the testing process, it’s essential to watch out for potential trouble signs that could indicate issues with the carburetor:
- Irregular engine idling.
- Hesitation or stalling during acceleration.
- Excessive exhaust emissions.
- Poor fuel economy.
- Inconsistent engine performance.
Frequently Asked Questions
How Often Should I Clean The Jets On My Carburetor?
You should clean the jets on your carburetor at least once a year to ensure smooth and efficient fuel delivery.
What Are The Signs That The Jets On My Carburetor Need Cleaning?
Signs that your jets need cleaning include rough idling, difficulty starting, and poor fuel efficiency. Cleaning can resolve these issues.
Can I Clean The Jets On My Carburetor Without Removing It?
Yes, you can clean the jets without removing the carburetor. Use a carburetor cleaner and follow the manufacturer’s guidelines.
What Is The Best Method To Clean Jets On A Carburetor?
The best method involves using a specialized carburetor cleaner to remove built-up deposits and then reassembling as per the manufacturer’s instructions.
Final Thoughts
Cleaning the jets on a carburetor is a vital maintenance task for optimal engine performance. By following the step-by-step process outlined in this guide, you can effectively remove any clogs or deposits and ensure smooth fuel delivery. Regular maintenance of your carburetor jets can improve fuel efficiency and extend the lifespan of your engine.