To attach the Hover 1 Buggy, follow these steps: 1. Flip the buggy over.
2. Align the holes on the buggy with the holes on the attachment. 3. Insert the screws into the holes and tighten them. 4. Turn the buggy back over and ensure it is securely attached. In this guide, we will explore the proper procedure to attach the Hover 1 Buggy, a popular accessory for hoverboards.
Whether you are a beginner or an experienced rider, properly attaching the buggy is essential for a safe and enjoyable experience. By following these steps, you can easily attach the buggy to your hoverboard and get ready for some fun rides.
Contents
- 1 Required Tools For Attaching Hover 1 Buggy
- 2 Preparing The Hover 1 Buggy For Attachment
- 3 Step-by-step Instructions For Attaching Hover 1 Buggy
- 4 Safety Measures To Consider While Using Hover 1 Buggy Attachment
- 5 Troubleshooting Common Issues With Hover 1 Buggy Attachment
- 6 Frequently Asked Questions On How To Attach Hover 1 Buggy
- 7 Conclusion
Required Tools For Attaching Hover 1 Buggy
Properly attaching the Hover 1 Buggy to your hoverboard is essential for a secure and enjoyable riding experience. To ensure a smooth installation process, it’s crucial to have the right tools at your disposal. These tools will not only make the attachment easier but also help you achieve a secure and durable connection. Let’s take a look at the List of tools needed for the installation process and understand the Importance of having the right tools for a successful attachment.
List Of Tools Needed For The Installation Process
Before you start attaching the Hover 1 Buggy, gather the following tools:
| Tool | Function |
|---|---|
| Socket Wrench | To loosen and tighten nuts and bolts |
| Screwdriver | To secure screws and fasteners |
| Allen Wrench | To adjust and tighten specific components |
| Adjustable Wrench | For general tightening and adjusting tasks |
| Phillips Head Screwdriver | To fit screws with cross-shaped slots |
| Pliers | To hold and manipulate small parts |
Importance Of Having The Right Tools For A Successful Attachment
Having the right tools is vital for a successful attachment of the Hover 1 Buggy to your hoverboard. Here’s why:
- Efficiency: The appropriate tools ensure a more efficient and smoother installation process. With the right tools, you can easily access and manipulate the necessary components, saving you time and effort.
- Precision: Each tool serves a specific purpose, allowing you to secure every attachment point with precision. This precision is crucial for ensuring a secure and stable connection, eliminating any potential risks during your ride.
- Durability: Using the right tools helps achieve a stronger and more durable attachment. Properly tightened nuts, bolts, and screws will hold the Hover 1 Buggy firmly in place, reducing the chances of any loose connections or accidents.
- Safety: When you have the right tools, you can follow the manufacturer’s instructions accurately. This ensures that you attach the Hover 1 Buggy correctly, reducing the risk of any safety hazards while riding.
Remember, using the correct tools not only simplifies the attachment process but also guarantees a secure connection that will enhance your riding experience. So make sure you have all the necessary tools before you begin attaching your Hover 1 Buggy.
Preparing The Hover 1 Buggy For Attachment
Attaching a Hover 1 Buggy to your electric scooter can transform your everyday ride into an exciting and adventurous journey. However, before you can start enjoying the thrill of this unique transportation experience, it is crucial to properly prepare your Hover 1 Buggy for attachment. This ensures compatibility with your desired electric scooter and guarantees the safety of your ride. In this guide, we will walk you through the essential steps to follow when preparing your Hover 1 Buggy for attachment.
Checking The Compatibility Of Your Hover 1 Buggy With Your Desired Electric Scooter
Before attaching your Hover 1 Buggy to your electric scooter, it is important to check the compatibility between the two. Not all electric scooters are suitable for the attachment of a Hover 1 Buggy, so it is crucial to ensure that the two devices can be seamlessly connected.
One way to determine compatibility is to check the weight limits of both your electric scooter and the Hover 1 Buggy. Some electric scooters may not have a sufficient weight capacity to accommodate the added weight of the attached buggy. As a result, it is necessary to consult the user manual or the manufacturer’s guidelines to confirm if your electric scooter can handle the additional load.
Additionally, you should also consider the dimensions and design of your electric scooter. The Hover 1 Buggy requires a certain type of scooter base to securely attach to, so make sure that your electric scooter matches the recommended specifications. This will ensure a proper fit and reduce the risk of any instability during your ride.
Examining The Hoverboard’s Safety Features Before Attachment
Ensuring the safety of your ride is of utmost importance when attaching a Hover 1 Buggy to your electric scooter. The hoverboard you plan to use as the base for the buggy should have essential safety features in place.
First and foremost, check that your hoverboard has a reliable and sturdy frame. A strong frame will provide the necessary support and stability for your Hover 1 Buggy attachment. Look for reinforced construction and high-quality materials that can withstand the additional stress of the buggy.
Furthermore, it is crucial to inspect the hoverboard’s braking system. A reliable braking mechanism is essential to maintain control and ensure a safe stopping distance when riding with the Hover 1 Buggy attached. Test the brakes before attaching the buggy to verify their functionality and responsiveness.
In addition to the braking system, consider the presence of built-in safety features such as LED lights, fender bumpers, and anti-slip foot pads. These features enhance visibility, protect the hoverboard from potential damage, and provide a secure footing for the rider.
By carefully examining the compatibility between your Hover 1 Buggy and electric scooter and evaluating the safety features of the hoverboard, you can confidently prepare your Hover 1 Buggy for attachment. This ensures an enjoyable and safe ride, maximizing the fun and excitement of your electric scooter journey.
Step-by-step Instructions For Attaching Hover 1 Buggy
Learn how to attach the Hover 1 Buggy with step-by-step instructions. Easily follow these guidelines to ensure a smooth installation process for your hoverboard buggy.
Explaining The Process Of Attaching The Hover 1 Buggy To An Electric Scooter:
Attaching the Hover 1 Buggy to an electric scooter is a straightforward process that can be done in just a few simple steps. By following these step-by-step instructions, you can quickly and securely fasten the attachment to your scooter and enjoy the benefits of a fun and versatile ride.
Instructions For Securely Fastening The Attachment To Ensure Safety:
Ensuring the attachment is securely fastened is essential for your safety and the smooth operation of the Hover 1 Buggy. To achieve this, follow these instructions:
- Begin by locating the attachment points on your electric scooter. These are typically found near the rear wheel and are designed to accommodate the Hover 1 Buggy.
- Once you have identified the attachment points, align the buggy with the scooter. Make sure the wheels of the buggy are facing the back of the scooter.
- With the buggy in position, use the provided bolts to attach the buggy to the attachment points. Insert the bolts through the designated holes on both the scooter and the buggy.
- Tighten the bolts securely using a wrench or screwdriver. Ensure that the buggy is firmly attached to the scooter. This will minimize any potential movement or wobbling during use.
- After securing the buggy, double-check all the bolts and fastenings to ensure they are properly tightened. Regularly inspect the attachment to prevent any loosening or dislodgement while riding.
- Once everything is securely fastened, give the attachment a gentle shake to test its stability. If any parts feel loose or unstable, go back and tighten the bolts further.
- When attaching the Hover 1 Buggy, it is also crucial to follow the manufacturer’s guidelines. Read and understand the instructions provided with the buggy to ensure proper installation and usage.
By following these step-by-step instructions and ensuring the attachment is securely fastened, you can confidently enjoy your electric scooter with the Hover 1 Buggy attached. Remember, safety should always be a priority when using any attachments or modifications to your scooter.
Safety Measures To Consider While Using Hover 1 Buggy Attachment
Ensure your safety while attaching the Hover 1 Buggy with these essential measures. Follow the step-by-step instructions carefully, use the recommended tools, and double-check the attachment to prevent any potential accidents or issues. Stay safe and enjoy the smooth ride!
Highlighting Important Safety Precautions When Riding With The Hover 1 Buggy Attachment
Riding with the Hover 1 Buggy attachment can be an exhilarating experience, but it is crucial to prioritize safety at all times. Whether you’re a beginner or an experienced rider, taking the necessary precautions will ensure a smoother and more secure ride. Here are some essential safety measures to consider:
- Always wear protective gear, including a helmet, knee and elbow pads, and wrist guards, to minimize the risk of injury in case of a fall or collision. Safety should be your top priority before hopping on your Hover 1 Buggy.
- Before attaching the Hover 1 Buggy, closely inspect the hoverboard for any damage or loose parts. Ensure that the tires are properly inflated and the frame is secure. Address any issues before use to prevent accidents caused by mechanical failure.
- Start in an open and flat space, away from traffic and obstacles. This will give you ample room to practice and maneuver safely while you get accustomed to the Hover 1 Buggy attachment.
- Maintain a safe speed and avoid sudden acceleration or deceleration. Gradually increase your speed as you gain confidence and familiarity with the attachment. Always ride at a speed that allows you to maintain control and react to any unexpected situations on the road.
- Be aware of your surroundings and pay close attention to pedestrians, cyclists, and other vehicles. Use hand signals and follow traffic laws and regulations to ensure your safety and the safety of others.
- When riding the Hover 1 Buggy attachment, maintain a firm grip on the handlebars at all times. This will provide stability and control, allowing you to maneuver effectively.
Tips For Maintaining Balance And Stability While Using The Attachment
Maintaining balance and stability is essential when riding the Hover 1 Buggy attachment. Follow these tips to enhance control and have a more enjoyable experience:
- Keep your feet positioned evenly on the foot pads of the hoverboard to distribute your weight evenly. Avoid leaning too far forward or backward, as this could throw off your balance.
- Maintain a relaxed posture, with your knees slightly bent and your back straight. This will help you absorb bumps and shocks more effectively, improving your stability on uneven terrain.
- Practice smooth and controlled turns, leaning your body and handlebars gently in the direction you want to go. Avoid making sudden or jerky movements, as it can destabilize the hoverboard.
- Regularly check the air pressure in the tires to ensure optimum traction and stability. Underinflated tires can affect your ability to maintain balance and control.
- Build your confidence gradually, starting with shorter rides and gradually increasing distance and difficulty. This will allow you to master the art of balancing and maneuvering with the Hover 1 Buggy attachment.
Troubleshooting Common Issues With Hover 1 Buggy Attachment
Attaching the Hover 1 Buggy to your electric scooter can add a new level of fun and excitement to your rides. However, like any mechanical device, it may encounter some common issues that can affect your overall experience. In this section, we will discuss the most common problems with the attachment and provide you with practical troubleshooting steps and solutions.
Identifying Common Problems With The Attachment And Their Possible Solutions
If you encounter any issues with your Hover 1 Buggy attachment, it is essential to identify the problem accurately before attempting to fix it. Here are some common problems you may face and their possible solutions:
-
Problem: Loose connections
Loose connections can cause the buggy attachment to become unstable or non-functional. It is crucial to check all the connection points to ensure they are secure.
Possible solutions:
- Tighten all the bolts and screws connecting the buggy to your electric scooter.
- Verify that the wires connecting the attachment are properly plugged in and not damaged.
- Inspect the battery connection to ensure it is secure.
-
Problem: Unstable ride experience
If you experience instability or wobbling while riding with the Hover 1 Buggy attachment, it can be both uncomfortable and unsafe.
Possible solutions:
- Check the alignment of the attachment with the scooter to ensure it is properly attached.
- Inspect the wheels for any signs of damage or excessive wear and replace if necessary.
- Ensure that the electric scooter’s tire pressure is within the recommended range.
Troubleshooting Steps For Issues Such As Loose Connections Or Unstable Ride Experience
When faced with common issues like loose connections or an unstable ride experience, follow these troubleshooting steps to resolve the problems:
-
Inspect and tighten all the bolts, screws, and wires connecting the Hover 1 Buggy attachment to your electric scooter. Ensure that the battery connection is secure and undamaged.
-
Check the alignment of the attachment with the electric scooter. Make sure it is properly attached and aligned according to the manufacturer’s instructions. Adjust if necessary.
-
Inspect the wheels for any signs of damage or wear. If you notice any issues, replace the damaged wheel(s) with new ones to ensure a stable ride experience.
-
Check the tire pressure of your electric scooter. Ensure it is within the recommended range specified by the manufacturer. Adjust the tire pressure if necessary.
-
After addressing the potential issues, take a test ride with the Hover 1 Buggy attachment. Evaluate its stability and functionality, and make further adjustments if needed.
By following these troubleshooting steps, you can effectively address common issues such as loose connections or an unstable ride experience with your Hover 1 Buggy attachment. Ensure a safe and enjoyable riding experience every time you attach the buggy to your electric scooter.
Credit: www.hover-1.com
Frequently Asked Questions On How To Attach Hover 1 Buggy
How Does Hover-1 Buggy Attachment Work?
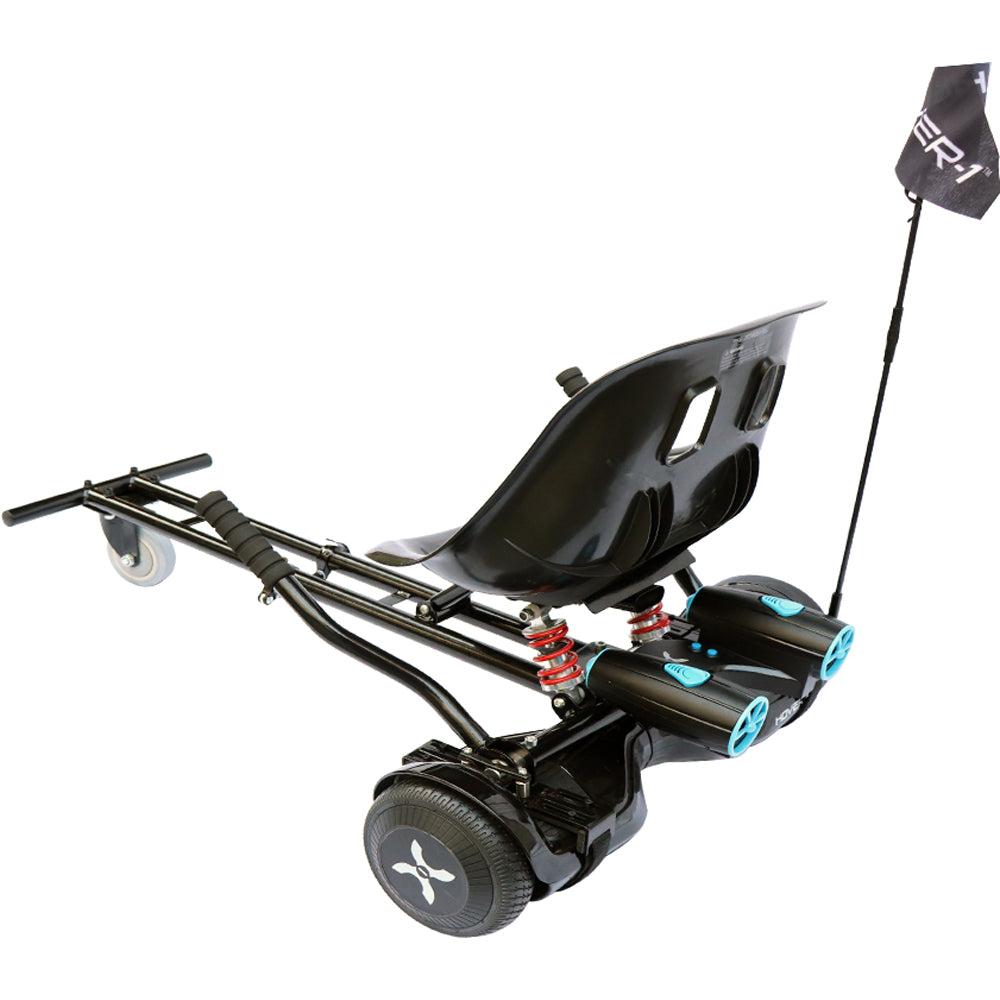
The Hover-1 buggy attachment works by attaching it to your Hover-1 electric scooter. It provides an adjustable seat and footrests for comfortable sitting, along with handlebars for steering. With the attachment, you can transform your scooter into a go-kart-like vehicle for a fun and exciting ride.
How Do I Connect My Hover-1 Electric Scooter To Bluetooth?
To connect your Hover-1 electric scooter to Bluetooth, follow these steps: Turn on your scooter, go to the Bluetooth settings on your phone, find the Hover-1 device, and click to pair. Enjoy wireless connectivity and control of your scooter through the Bluetooth connection.
Simple and convenient!
What Is The Hover-1 With Buggy?
The Hover-1 with Buggy is a unique and innovative electric scooter that comes with an attached buggy seat. It offers a fun and comfortable riding experience for both kids and adults, making it a popular choice for outdoor adventures.
How Does A Hoverboard Go Kart Attachment Work?
A hoverboard go kart attachment works by securely attaching to a standard hoverboard. It offers a comfortable seat, steering wheel, and foot pedals for control. The attachment uses the hoverboard’s motor and sensors to allow riders to maneuver and accelerate, creating a fun and unique go-karting experience.
Conclusion
To sum up, attaching the Hover 1 Buggy is a straightforward process that can be done by following a few simple steps. By using the provided tools and carefully following the instructions, you can ensure a secure and stable attachment.
Whether you are a beginner or an experienced rider, attaching the Hover 1 Buggy will enhance your riding experience and enable you to cruise in style. So, get ready to hit the road with your Hover 1 Buggy and enjoy the thrill of a smooth and exciting ride.