To reset your Hover-1 scooter, locate the power button and hold it down for about 10 seconds. This will reset the scooter’s settings and resolve any issues you may be experiencing.
Now, I will provide a well-rounded introduction on resetting the Hover-1 scooter. Hover-1 scooters are popular electric scooters known for their efficiency and convenience. However, like any other electronic device, they may occasionally require a reset to resolve software or connectivity issues.
Resetting a Hover-1 scooter is a simple process that can be done in a few moments. Whether you are encountering a malfunction or want to troubleshoot a particular problem, resetting your scooter can be a helpful solution. In the following guide, we will explain exactly how to reset your Hover-1 scooter and regain its optimal performance. By following these instructions, you can swiftly troubleshoot any issues and get back to enjoying your electric scooter in no time.
Contents
Understanding The Need For Resetting
Welcome to this informative blog post on how to reset your Hover-1 scooter. If you own one of these nifty electric scooters, you may have encountered some issues that necessitate a reset. Understanding the need for resetting your scooter is crucial to maintaining its optimal performance. In this section, we will explore common issues that hover-1 scooter owners face and highlight the importance of resetting the scooter when faced with such issues.
Common Issues With Hover-1 Scooters
Hover-1 scooters are fantastic devices that provide efficient and eco-friendly transportation. However, like any other electronic device, they may experience occasional glitches. It is important to be aware of the common issues that can arise so that you can address them appropriately. Here are some common issues you may encounter with your Hover-1 scooter:
1. Battery Malfunction:
One of the most common problems with Hover-1 scooters is a battery malfunction. The scooter may fail to charge properly or might not hold a charge for an extended period. This can significantly hamper your riding experience and limit the scooter’s range. If you are experiencing battery-related issues, a reset can often resolve the problem.
2. Control Panel Errors:
The control panel on your Hover-1 scooter plays a crucial role in ensuring a smooth and safe ride. However, at times, you may encounter errors on the control panel display. This could include incorrect speed readings, unresponsive buttons, or even a completely blank screen. Resetting the scooter can help recalibrate the control panel and restore its functionality.
3. Motor Performance Issues:
Motor performance is another area that may require a reset. You might notice reduced power output, uneven acceleration, or unusual noises coming from the motor. These issues can often be resolved by performing a reset, allowing the scooter’s internal systems to realign and resume optimal performance.
Importance Of Resetting The Scooter
Now that we have discussed the common issues faced by Hover-1 scooter owners, it is crucial to understand why resetting the scooter is of utmost importance. Here are some key reasons why you should consider resetting your Hover-1 scooter:
1. Resolving Technical Glitches:
Resetting your scooter can help eliminate various technical glitches that may affect its performance. By conducting a reset, you give the scooter a chance to recalibrate its internal systems and resolve any minor issues that might be causing disruptions in its functionality.
2. Restoring Optimal Performance:
Resetting your Hover-1 scooter can often restore its optimal performance. This includes improved battery life, smoother motor operation, and accurate control panel readings. By performing a reset, you allow the scooter to reset its settings and start fresh, potentially eliminating any performance-related issues.
3. Saving Time and Money:
Resetting your Hover-1 scooter can potentially save you time and money. Instead of immediately seeking professional assistance or buying replacement parts, a simple reset may be all that’s needed to address the issue. By troubleshooting and resetting the scooter yourself, you can save on unnecessary repair costs and get back to enjoying your rides quickly.
In conclusion, understanding the need for resetting your Hover-1 scooter is paramount. By addressing common issues and utilizing the reset function, you can keep your scooter running smoothly and enjoy a hassle-free ride every time. Now that we have explored the common issues and the importance of resetting, let’s move on to the step-by-step process of resetting your Hover-1 scooter.
Steps To Reset Hover-1 Scooter
To reset your Hover-1 scooter, simply locate the reset button on the control panel and press it for a few seconds. This will restore the scooter to its default settings and resolve any issues you may be experiencing. Get back to enjoying your hoverboard in no time!
Powering Off The Scooter
To start the reset process, power off your Hover-1 scooter by pressing and holding the power button until the LED display turns off and all lights go dark.
Identifying The Reset Button
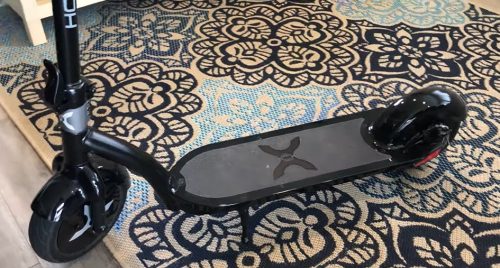
Once the scooter is powered off, locate the reset button on the scooter. This button is typically found near the charging port or on the bottom of the scooter.
Press And Hold
Press and hold the reset button for at least 10 seconds. You may need to use a small tool or pen to ensure a firm press on the button.
Releasing The Button
After holding the reset button for the specified time, release it and wait for a few seconds to ensure that the reset process is complete.
Powering The Scooter Back On
Now, power the scooter back on by pressing the power button in the same way as you turned it off. You should see the LED display and lights coming back to life, indicating that the reset was successful.
Troubleshooting After Reset
Resetting your Hover-1 scooter can often resolve various issues and restore its functionality. However, there may be instances where the reset doesn’t completely solve the problem. In such cases, it is important to perform additional troubleshooting steps to ensure your scooter is fully operational. This section will guide you through the process of troubleshooting your Hover-1 scooter after a reset.
Verifying The Reset
Before diving into further troubleshooting, it is crucial to verify that the reset was successful. To do this, check if the scooter’s settings have been restored to their default configuration. You can typically find a reset button on your scooter, usually located near the power button or underneath the battery compartment. Press and hold the reset button for about 10 seconds. Once released, your scooter should power off and then on again, indicating a successful reset. If you don’t notice any changes or the scooter doesn’t respond, try performing the reset procedure again.
Testing The Scooter Functionalities
After verifying the reset, it’s time to test the different functionalities of your Hover-1 scooter. This step will help identify any remaining issues that need to be addressed. Here are some key areas to focus on during testing:
- Power and Acceleration: Ensure the scooter powers on smoothly and accelerates without any glitches.
- Braking System: Test the brakes to guarantee they engage and release properly.
- Handlebar Controls: Check if the throttle, brake lever, and any additional controls on the handlebar are responsive and functioning correctly.
- Lights and Indicators: Verify that all lights, including headlights, taillights, and turn signals, are illuminating as expected.
- Wheel Movement: Pay attention to any irregularities in the wheels’ rotation or alignment while riding or maneuvering the scooter.
Additional Adjustments If Necessary
If you encounter any issues during the testing phase, there are a few additional adjustments you can make to troubleshoot further:
- Check Battery Connection: Ensure that the battery is securely connected and properly seated in its compartment.
- Inspect Tires: Examine the tires for any signs of damage or wear that may affect the scooter’s performance.
- Verify Tire Pressure: Maintain proper tire pressure according to the manufacturer’s recommendations.
- Calibrate Sensors: If your scooter has sensitive sensors, follow the manufacturer’s instructions to calibrate them for accurate readings.
- Review User Manual: Consult the scooter’s user manual for specific troubleshooting steps and possible solutions for common issues.
By following these troubleshooting steps after resetting your Hover-1 scooter, you increase the chances of resolving any underlying problems affecting its functionality. Remember, accurate diagnosis and attention to detail are key in ensuring a smooth and safe riding experience.
Resetting Hover-1 Scooter: Tips And Precautions
Resetting the Hover-1 Scooter is an essential process to resolve certain issues or errors that may crop up during its usage. However, it is crucial to follow proper guidelines and take necessary precautions while performing the reset. In this section, we will discuss some important tips and precautions for resetting your Hover-1 Scooter effectively.
Ensuring Safety Measures
When it comes to resetting your Hover-1 Scooter, the safety of both yourself and the scooter should be your top priority. Follow these safety measures to prevent any potential accidents or injuries:
- Before you begin the reset process, ensure that the scooter is turned off and disconnected from the power source.
- Wear appropriate protective gear such as helmet, knee pads, and elbow pads to safeguard yourself from any unforeseen incidents.
- Choose a safe and flat surface to perform the reset. This will prevent the scooter from toppling over or causing any damage to nearby objects.
Avoiding Potential Risks
Avoiding potential risks is crucial to ensure a smooth and successful reset process. Keep the following points in mind:
- Do not attempt to reset the scooter while it is in motion or while riding it. Make sure the scooter is stationary and powered off.
- Avoid touching any exposed wires or components during the reset process. This reduces the risk of electric shocks or damage to the scooter.
- Double-check the user manual or manufacturer’s instructions for any specific precautions or warnings related to resetting your Hover-1 Scooter. Adhering to these guidelines will help you avoid any potential risks.
Best Practices For Successful Resetting
Follow these best practices to ensure a successful reset of your Hover-1 Scooter:
- Start by carefully reading the user manual or manufacturer’s instructions. It will provide you with the necessary steps and guidelines to perform the reset correctly.
- Check if there are any specific reset buttons or switches on the scooter. These might be mentioned in the manual and can simplify the process for you.
- If your scooter does not have specific reset buttons, follow the general reset procedure, which usually involves turning the scooter on and off in a particular sequence.
- If you encounter any difficulties or the reset does not work as expected, reach out to the manufacturer’s customer support for assistance. They can provide you with personalized guidance or further troubleshooting steps.
Seek Professional Assistance If Needed
If you encounter complex issues or are unsure about the reset process, don’t hesitate to seek professional assistance. It’s important to prioritize safety and ensure that the Hover-1 scooter is reset correctly to avoid any potential risks or damage.
Recognizing Complex Issues
When attempting to reset your Hover-1 scooter, it’s essential to recognize complex issues that may require professional assistance. Signs of complex issues can include persistent malfunctions, unusual sounds, or any physical damage to the scooter that may affect its functionality.
Contacting Customer Support
If you encounter complex issues or are unsure about the reset process, reaching out to the manufacturer’s customer support can provide valuable guidance. They can offer specific instructions tailored to your scooter model and help troubleshoot any issues you may be experiencing.
Understanding Warranty Coverage
It’s crucial to understand the warranty coverage provided for your Hover-1 scooter. If the reset process is related to potential manufacturing defects or issues covered by the warranty, contacting customer support for assistance could potentially save you from incurring unnecessary costs.
Credit: www.inboardskate.com
Frequently Asked Questions For How Do I Reset My Hover-1 Scooter
How Do I Reset My Hover-1 Scooter To Factory Settings?
To reset your Hover-1 scooter to factory settings, locate the reset button on the scooter’s control panel or underneath the footboard. Press and hold the reset button for around 10 seconds until the indicator lights flash or the scooter powers off.
Release the button and your Hover-1 scooter will be reset to its original factory settings.
What Should I Do If My Hover-1 Scooter Is Not Working Properly?
If your Hover-1 scooter is not working properly, start by checking the battery level and ensuring it is fully charged. Inspect all the connections and make sure they are secure. If the issue persists, try resetting the scooter to factory settings as instructed in the manual.
If none of these steps help, contact Hover-1 customer support for further assistance.
How Often Should I Reset My Hover-1 Scooter?
There is no specific frequency for resetting your Hover-1 scooter. Resetting should only be done when necessary, such as when the scooter is frozen, unresponsive, or experiencing technical issues. Resetting too frequently may not be beneficial and unnecessary. Follow the instructions provided in the manual or contact Hover-1 customer support for guidance on when to reset your scooter.
Conclusion
Resetting your Hover-1 scooter is a simple process that can help resolve technical issues. By following the steps outlined in this post, you can quickly get your scooter back in working order. Remember to refer to your user manual for specific instructions and contact customer support if you need further assistance.
Keep riding safely!