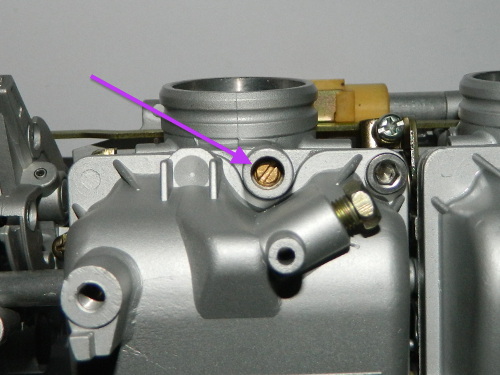
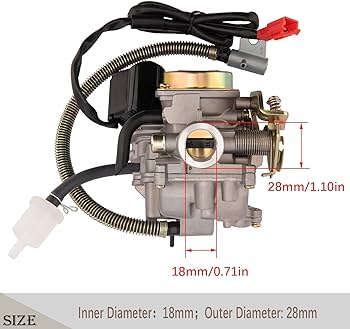
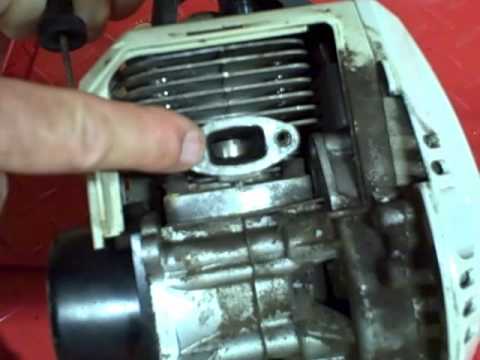
To set the air screw on a carburetor, warm up the engine and turn the screw until the idle is at its highest. Then, turn the screw out until the engine idles at its maximum.
Setting the air screw on a carburetor is crucial for ensuring that the engine runs smoothly and efficiently. Proper adjustment of the air screw can improve engine performance and fuel efficiency. By following the correct steps, you can optimize the air-fuel mixture and achieve optimal combustion, resulting in better overall engine operation.
Understanding how to set the air screw on a carburetor will allow you to maintain your engine’s performance and extend its longevity. Whether for maintenance or troubleshooting, knowing how to set the air screw can help you keep your engine running in top condition.
Contents
Understanding The Air Screw Adjustment
Understanding the Air Screw Adjustment is crucial for optimizing the performance of a carburetor. The air screw plays a pivotal role in regulating the air-fuel mixture, directly impacting the engine’s power delivery and responsiveness. In this section, we’ll delve into the significance of the air screw, the effects of its adjustments on the fuel mixture, and the symptoms that indicate improper settings.
The Role Of The Air Screw In Carburetor Performance
The air screw, located on the carburetor, controls the amount of air entering the idle circuit. By adjusting the air screw, you can fine-tune the air-to-fuel ratio at idle speed, ensuring optimal combustion efficiency. Essentially, the air screw acts as a precision tool for regulating the mixture and maintaining engine stability during idling and low-speed operation.
Impact Of Air Screw Adjustments On Fuel Mixture
Adjusting the air screw directly influences the fuel mixture. Turning the air screw in (clockwise) decreases the air flow, resulting in a richer fuel mixture, while turning it out (counterclockwise) increases air flow, leaning out the mixture. Therefore, properly adjusting the air screw is paramount for achieving the ideal air-fuel ratio, enhancing engine performance and responsiveness throughout the RPM range.
Symptoms Of Improper Air Screw Settings
- Hard starting or stalling at idle
- Lack of throttle response
- Rough or uneven idling
- Excessive exhaust smoke
- Poor fuel efficiency
Tools Required For Adjusting The Air Screw
When adjusting the air screw on a carburetor, having the right tools is crucial. Using the correct tools will ensure that the air screw is accurately adjusted, allowing for optimal engine performance. Below, we outline the types of tools needed for air screw adjustment and the proper use of these tools to achieve precise adjustments.
Types Of Tools Needed For Air Screw Adjustment
Adjusting the air screw on a carburetor requires specific tools to ensure the adjustments are made accurately. The following tools are essential for adjusting the air screw:
- Flathead screwdriver
- Carburetor adjustment tool
- Small engine tachometer
Proper Use Of Tools For Adjusting The Air Screw
When using the tools for adjusting the air screw, it’s important to follow proper practices to achieve the best results. Here are the steps for the proper use of tools:
- Use a flathead screwdriver to carefully locate the air screw. Ensure the screwdriver is the appropriate size to avoid damaging the air screw.
- Utilize a carburetor adjustment tool to turn the air screw in small increments, following the manufacturer’s recommended settings for your specific carburetor model.
- Employ a small engine tachometer to monitor the engine’s RPM while making adjustments to ensure optimal performance.
Step-by-step Guide To Setting The Air Screw
Looking to optimize your carburetor’s performance? Adjusting the air screw is essential. Follow this comprehensive step-by-step guide to fine-tune your carburetor’s air screw for optimal engine performance. Master the art of setting the air screw to ensure your engine runs smoothly and efficiently.
Locating The Air Screw On The Carburetor
The air screw is a crucial component of the carburetor, responsible for controlling the air-fuel mixture. It is typically located on the side of the carburetor, often near the bottom. Refer to the specific manufacturer’s manual to accurately locate the air screw on your carburetor.
Preparing The Carburetor For Adjustment
Before starting the adjustment process, it’s important to ensure the carburetor is clean and free from any debris. Make sure the engine is off and the carburetor is easily accessible. Additionally, familiarize yourself with the specific recommended settings for your particular model of carburetor.
Adjusting The Air Screw: Clockwise Vs. Counterclockwise Motion
When adjusting the air screw, it’s essential to understand the impact of both clockwise and counterclockwise motion. Turning the air screw clockwise typically results in a leaner air-fuel mixture, while turning it counterclockwise leads to a richer mixture. Begin by gently turning the screw in one direction, while carefully monitoring the engine’s response.
Testing And Fine-tuning The Air Screw Setting
Once you’ve adjusted the air screw on your carburetor, it’s crucial to conduct performance tests and fine-tune the setting for optimal engine performance. This step is essential to ensure that your carburetor is delivering the right air-fuel mixture, leading to improved throttle response and fuel efficiency.
Conducting A Performance Test After Adjustment
After adjusting the air screw, it’s important to conduct a performance test to evaluate the impact of the adjustment. This test involves running the engine at various speeds and loads to check for any irregularities in the engine’s performance.
To conduct a performance test, follow these steps:
- Start the engine and allow it to warm up to normal operating temperature.
- Slowly throttle up and down to check for any hesitations or stumbles in the engine’s response.
- Observe the idle speed and adjust if necessary to ensure smooth idling.
- Check for any signs of rich or lean mixture by examining the color of the spark plug. A greyish-tan color indicates a properly balanced air-fuel mixture.
Fine-tuning The Air Screw For Optimal Carburetor Performance
After conducting the performance test, fine-tuning the air screw may be necessary to achieve optimal carburetor performance. This step involves making small adjustments to the air screw to achieve the ideal air-fuel mixture ratio, ensuring efficient combustion and smooth engine operation.
Follow these steps to fine-tune the air screw:
- Using a tachometer, adjust the idle speed to the manufacturer’s specifications.
- Gradually turn the air screw in or out in small increments, monitoring the engine’s response as you make each adjustment.
- Seek the optimal setting where the engine’s response is smooth and throttle transitions are seamless.
- Repeat the performance test to confirm the effectiveness of the fine-tuning adjustments.
Troubleshooting Common Issues With Air Screw Adjustment
If you’re experiencing trouble with your motorcycle’s performance, look no further than the air screw on the carburetor. The air screw is a crucial component that helps regulate the air-to-fuel ratio, which is vital for smooth engine operation. However, incorrect air screw adjustments can lead to several issues that can hamper your ride. In this section, we will focus on troubleshooting common problems associated with air screw settings.
Identifying Symptoms Of Incorrect Air Screw Adjustments
Identifying the symptoms of incorrect air screw adjustments is crucial for maintaining your bike’s optimal performance. Here are some common indicators that your air screw may be improperly adjusted:
- Erratic idling or stalling
- Difficulty in starting the engine
- Uneven or irregular throttle response
Rectifying Common Problems Associated With Air Screw Settings
Rectifying common problems associated with air screw settings requires a methodical approach. Here are the steps to rectify common issues:
- Clean the Carburetor: A dirty or clogged carburetor can lead to problems with the air screw. Cleaning the carburetor thoroughly can help resolve issues related to air screw adjustment.
- Adjust the Air Screw: Use a screwdriver to turn the air screw clockwise or counterclockwise in small increments until you achieve the optimal idle speed and throttle response.
- Check for Air Leaks: Inspect the intake manifold and carburetor for any signs of air leaks, as they can affect the air screw’s performance. Address any leaks immediately to ensure the air screw functions correctly.

Frequently Asked Questions
How Do I Know If My Air Screw Is Set Correctly?
The correct setting for the air screw on the carburetor depends on the specific make and model of your vehicle. To ensure it’s set correctly, refer to the manufacturer’s specifications in the vehicle’s manual or consult a professional mechanic.
What Are The Symptoms Of A Misadjusted Air Screw?
Misadjusted air screw can lead to symptoms like rough idling, poor acceleration, and stalling. If you notice these issues, it may indicate that the air screw on your carburetor needs adjustment. Consult a mechanic for proper diagnosis and adjustment.
Can I Adjust The Air Screw On My Carburetor Myself?
Yes, you can typically adjust the air screw on your carburetor with the right tools and knowledge. However, it’s important to understand the specific requirements for your vehicle and follow the manufacturer’s guidelines. If you’re unsure, it’s best to seek professional assistance to avoid potential damage.
What Tools Do I Need To Adjust The Air Screw On The Carburetor?
Adjusting the air screw on a carburetor may require tools such as a screwdriver, wrench, or specialized carburetor adjustment tool. Refer to your vehicle’s manual or online resources for specific tool requirements and instructions tailored to your car’s make and model.
Final Thoughts
In this guide, we have covered detailed instructions for setting the air screw on the carburetor. By following these steps, you can optimize the air/fuel ratio for optimal engine performance. Proper adjustment of the air screw is essential for smooth idling, throttle response, and overall fuel efficiency.
Mastering this simple adjustment can make a world of difference in your engine’s performance.


